


Hi guys,
My final Elite tutorial for the moment. I'll begin with saying that the Strongarm is fairly impressive out of the box, and addresses a lot of the issues that the Mav had. Slamfire is rather nice, and the turret extends out quite a bit further. It is a little bit front-heavy, but nothing to be concerned about.
I've experienced some issues with this mod, so at this stage, I'm calling it as unfinished. While I've managed to significantly increase range, something has gone askew with the rotation mech. I'm working on a couple of fixes now, but really need to get my hands on another couple of units for experimentation. So, as always, follow this guide at your own risk... lol
Mod's covered -
* AR removal
* Spring upgrade
* Catch spring upgrade
* Plunger to turret seal improvement
* Rear-loading
Tools:
•Basic tool kit
•Rotary tool
Materials:
•Black Tactical NFV1 spring or similar
•Silicone Grease
•Replacement catch spring
•Teflon tape
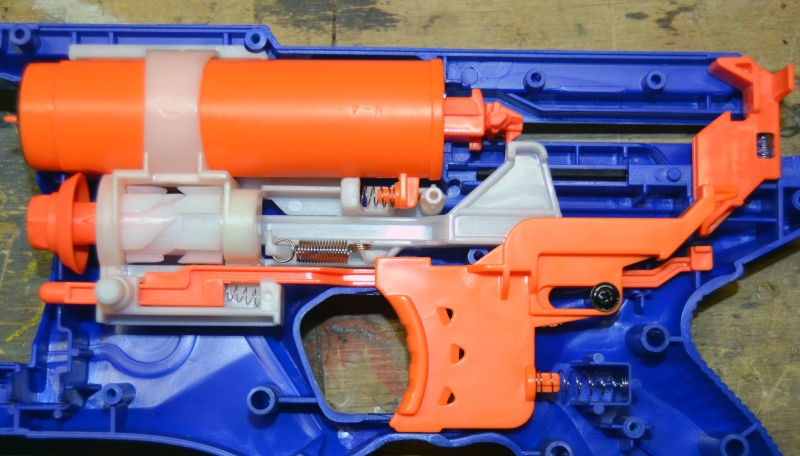
Open up your blaster - there's a screw hidden underneath the cocking slide. I'm really impressed with the new catch design, although the spring is quite weak. Remove the stock spring, and put in a heavier one.
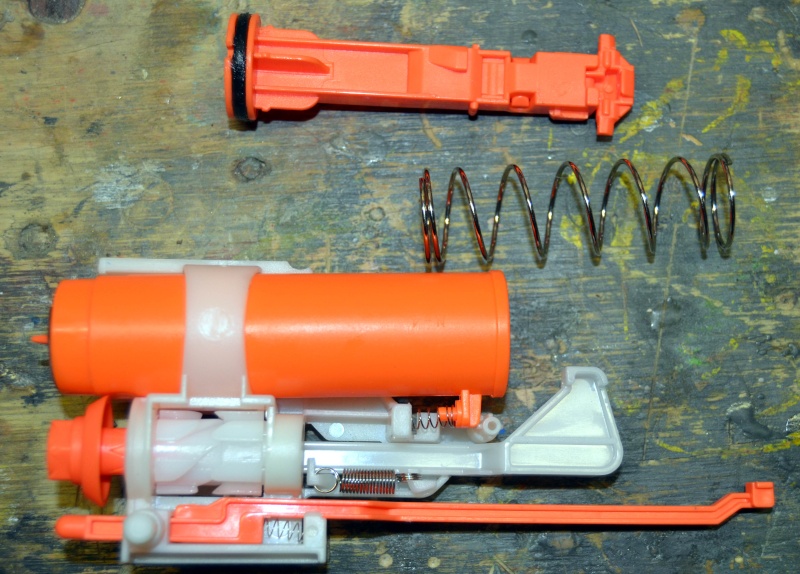
Remove the trigger, and the internal assembly will come out. Remove the orange plunger tube from the white assembly, and strip it down. I cut 2.5 coils off the NF spring, and wound it on the plunger rod, with the cut end facing towards the PH. Add some teflon tape under the o-ring, re-lube, and place to one side.
Notice the piece of black foam... that's the plunger to turret seal. I cut a duplicate gasket out of some insertion rubber, and glued it over the top of the stock gasket. There's multiple ways of doing this, just use your imagination and whatever resources you have available.

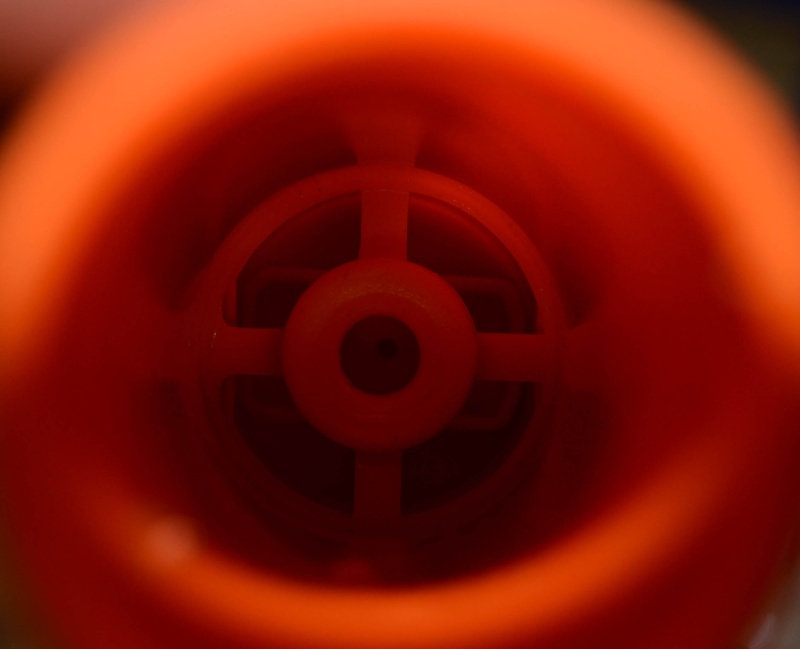
Here you can see the AR - There's 2 trains of thought as to whether it needs to be removed or not. It isn't a major job, so I ripped it out by drilling in through the back of the PT. I've since discovered you can remove the cap from the front of the PT, and the AR simply falls out.
These are the parts of the AR that you don't require.

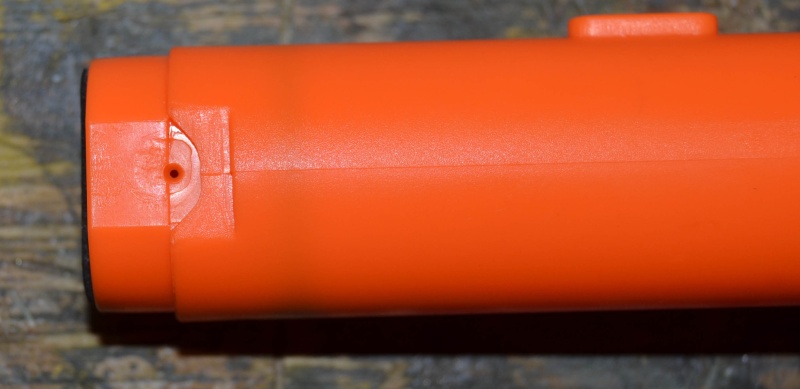
There's also a pin hole on the PT that needs to be sealed up. Use either e-tape or super glue. Once it's dry, you can re-assemble all the internals.
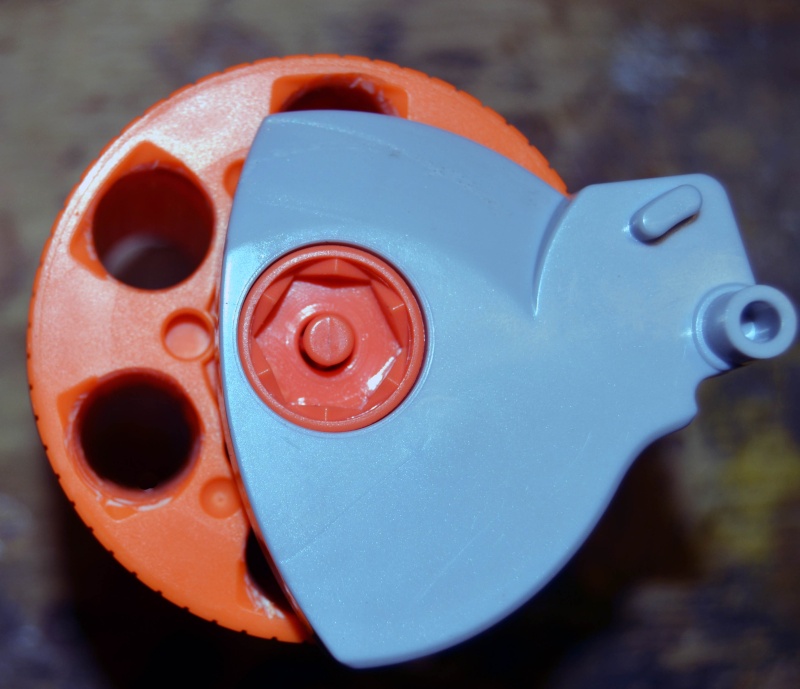
There's no AR in the turret like in the Mav. The connecting strip is only to hold the dart peg.

Use a pair of needle-nose pliers, and tear out the pegs/strips. Next, put a sanding bit on your rotary tool, and ream out the back until a dart fits well.
All that's left to do now is to completely re-assemble the blaster, and test fire. The cocking slide return spring is a little trick to reattach, but take your time, and it shouldn't prove difficult.
Like I mentioned, I'm still working on a fix for the turret rotation... stay tuned.
Modded Ranges -
Medium stinger - 65ft flat avg, 74ft flat maximum.
Stock elite - 77ft flat avg, 86ft flat maximum.
Cheers,
My final Elite tutorial for the moment. I'll begin with saying that the Strongarm is fairly impressive out of the box, and addresses a lot of the issues that the Mav had. Slamfire is rather nice, and the turret extends out quite a bit further. It is a little bit front-heavy, but nothing to be concerned about.
I've experienced some issues with this mod, so at this stage, I'm calling it as unfinished. While I've managed to significantly increase range, something has gone askew with the rotation mech. I'm working on a couple of fixes now, but really need to get my hands on another couple of units for experimentation. So, as always, follow this guide at your own risk... lol
Mod's covered -
* AR removal
* Spring upgrade
* Catch spring upgrade
* Plunger to turret seal improvement
* Rear-loading
Tools:
•Basic tool kit
•Rotary tool
Materials:
•Black Tactical NFV1 spring or similar
•Silicone Grease
•Replacement catch spring
•Teflon tape
Open up your blaster - there's a screw hidden underneath the cocking slide. I'm really impressed with the new catch design, although the spring is quite weak. Remove the stock spring, and put in a heavier one.
Remove the trigger, and the internal assembly will come out. Remove the orange plunger tube from the white assembly, and strip it down. I cut 2.5 coils off the NF spring, and wound it on the plunger rod, with the cut end facing towards the PH. Add some teflon tape under the o-ring, re-lube, and place to one side.
Notice the piece of black foam... that's the plunger to turret seal. I cut a duplicate gasket out of some insertion rubber, and glued it over the top of the stock gasket. There's multiple ways of doing this, just use your imagination and whatever resources you have available.
Here you can see the AR - There's 2 trains of thought as to whether it needs to be removed or not. It isn't a major job, so I ripped it out by drilling in through the back of the PT. I've since discovered you can remove the cap from the front of the PT, and the AR simply falls out.
These are the parts of the AR that you don't require.
There's also a pin hole on the PT that needs to be sealed up. Use either e-tape or super glue. Once it's dry, you can re-assemble all the internals.
There's no AR in the turret like in the Mav. The connecting strip is only to hold the dart peg.
Use a pair of needle-nose pliers, and tear out the pegs/strips. Next, put a sanding bit on your rotary tool, and ream out the back until a dart fits well.
All that's left to do now is to completely re-assemble the blaster, and test fire. The cocking slide return spring is a little trick to reattach, but take your time, and it shouldn't prove difficult.
Like I mentioned, I'm still working on a fix for the turret rotation... stay tuned.
Modded Ranges -
Medium stinger - 65ft flat avg, 74ft flat maximum.
Stock elite - 77ft flat avg, 86ft flat maximum.
Cheers,
