
What's up guys!
My account has been approved (thanks, Phuonguyen!) and so I'm here contributing my first post to this forums.
This is my second version of the Barricade Clipfed Conversion mod, and I would like to thank a friend named "Spartan" for his Longshot buttstock.
Since SGNerf and myself came out with the 1st version of the clipfed mod, many other enthusiasts have created their own versions,
including transplanting the Barricade internals into a Longstrike shell, but the most commonly done version (especially not in our region)
is the one which uses the Raider CS-35 magwell.
If you have seen one, or read about one, you would know that although it is a very secure way of holding your mags onto your barricade,
it requires alot of cutting, especially cutting into the main "body" of the barricade itself, and of course, sacrificing the Raider magwell
which in turn renders the Raider useless since it cannot securely hold a clip any longer, but the biggest gripe that I have with that method
is that you have to load your darts into the clip facing backwards. To me, I would want to carry "universal" clips on me when I go for a war,
so that I can swap clips between any of my on-hand blasters at any time.
The thought of me having to carry clips with darts loaded backwards specially for my Barricade felt like it defeated the whole purpose of converting it to being clip-fed.
Also, there are some versions with the magwell facing the "correct" direction, but that also means that the clip-release button is very close to the trigger, giving you just enough space to squeeze your index fingers in for a trigger squeeze. I've got relatively stubby and chubby fingers so that's a hassle to me too.
So, TGFSpartan!
Along came his longshot buttstock...
and the buttstock means a clip holder...
and along came this version...
and here's the writeup.
Things you need:
- a marker
- Dremel / Drill
- Cutting Bit
- Sanding Bit (optional)
- Small Drill Bit (i used a size big enough for an M3 machine screw)
- Some screws (i used M3)
- some washers or nuts (sizes vary, you'll know why later)
- and if you're extra kiasu since we're Singaporean, some goop / epoxy.
First of all, let's start with the Longshot buttstock.
You only need this much:

with a clip on the inside it will look like this (ala fake cross-section!)

now let's mark it and start cutting away!


now for this part it's a little more intricate:

that's just the first side. then chop the second side till you get something like this:

when you're done it should look something like this:


that done, put whatever's left of the buttstock aside.
Now let's move on to the barricade itself.
open up your barricade and remove the turret (and all little things attached to it.)
then, chop away the bottom "base"!

now, let's look at the internals.
I'll cover some good tricks you might want to apply to your barricade even if you're not going to do this clipfed conversion mod.
However, I'm not going through the switch relocation "trigger on-off" mod, which SGNerf has already kindly done.
Since we're going to have the barricade fire off streamlines, please wrap the flywheels with afew layers of e-tape.
There is no "exact amount" of e-tape to be used. Trial and error, my friend. keep trying until your barricade fires off streamlines.
Every barricade is manufactured with a slight margin of error, so every barricade will require a different amount of e-tape.
For my barricade, it took 2 rounds of my e-tape on each flywheel.
now let's attack the dart pusher piece. if you dont know, it's this piece:

what we're doing here is to get a little more distance out of the dart pusher.
why? so it'll push the darts just that few mm further into the flywheel, of course!
so we're going to sand the "track" till it's a little longer.. just by afew mm!
before:

after:

and that's not all... remove the screw holding the return spring, and stretch the return spring like in the next pic.
oh, and while you're at it, grab some washers (i used 2) and move the screw over to this location:

now your trigger pull will be abit tougher, but the dart pusher will travel a little further!
before you put the dart pusher back, get your drill bit and get ready to drill a hole:
before:

after:

and then attach a screw, and you can add a washer, a bunch of washers, or some nuts, or whatever it is, this will have to be tweaked later.

i know, you're going to say "OMG IT'S OFF-CENTER!!!"
yes i know, and it's done for good reason. you'll find out why later.
now look at the trigger. see that long thing sticking out? that's actually the prong to rotate the turret.
since there's no turret, there shall not be a need for the prong.


you can actually cut the whole thing off till it's flush, but for me, i left that bit because it sits just nicely on the outside of the clip,
it's sort of a "kiasu-ism" thing but you can do without this. it's just me.
Next, let's go remove the irritating "lock" or whatever mechanism it is.
this is the mechanism that forces you to fully squeeze the trigger or it'll just get stuck mid-way.

just unscrew those two silver screws and remove everything that was being held there. yayness.
we're almost there!
now what you need to do, is grab the right side of your "new" clip holder, and do this to the right side of the barricade:

i just used one machine screw. however, if you want that extra strength, go ahead and slap on some epoxy or goop or whatever you want.
do the same for the left side. but, if you realised, the "top wall" of the left half of the barricade shell is higher than the right half.
you need to use some kind of spacers to align the clip holder and the top wall to the other half of the shell.
i used a combination of an m4 nut and 2 small washers.
they gave me the exact amount of space needed. you can't see this in the pic, SORRY!
you can, however, see the space between the top of the clip holder and the top wall.

these pics were taken before i made the "intricate cuts" to the top of the clip holder, that's why there isn't a hole on top like you should have.
it's supposed to be there. sorry for the confusion!
now just fit the two shells together, and look at the bottom. depending on your alignment, you may or may not have to do this:

open it back up, and "test fit" a clip in.
it should look something like this:


now do you know why the hole was drilled off-center?
cos you dont want your screw to go into the little slot at the back of your darts, which defeats the purpose of wanting to extend your dart pusher!
earlier i mentioned that you need to tweak the config of your dart pusher. trial and error again, my friend.
find a combination that is good enough to not impede on the darts moving up from the clip, while being able to push the darts into the flywheels.
i ended up using an m3 screw with one single washer. yours will probably be different.
close it back up, and you're done!
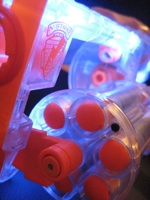
now you have a mean looking clipfed Barricade!


Next step, go nuts and make two so you can be "Automatic Clipfed Akimbo Barricader"!!
yes, it holds 6-dart clips, 18-dart clips, and 18-drum mags very well.
Demo video time!
now go convert your own Barricade!!!
hahahah...
EDIT: Okay i've got an update on my barricade -
Since i was playing around with my barricade and trying to tweak it's effeciency,
i've done something to the flywheel system and the dart pusher system so that now, virtually no darts get stuck or get caught on the dart pusher on it's return after firing a shot.
For those of you familiar with the Barricade, look into the entrance (where the darts enter) of the flywheel box, and you'll see two "guides" before the flywheels.
Most of the time, clipfed Barricades see the darts being pushed just a little short of the flywheels. Extending the dart pusher any longer will block subsequent darts from coming out of the clip...
So my solution?
I cut off the lower "guide" at the entrance of the flywheel box, wrapped the lower flywheel with a ton of e-tape (since it was also the guide that limited how much e-tape you could wrap on the flywheels), and did absolutely NOTHING to the dart pusher.
Now what happens is that the darts get pushed into the flywheel box, and instead of meeting with the guides, they meet with the lower flywheel first, which in turn, helps to pull it in all the way.
I've got a number of nerf enthusiasts try out my clipfed barricade and there were no mis-firings thus far
-----------------------------------------------------------------
update:
Okay so here's my own rev 2.5,
because it's basically using a longshot buttstock clipholder but i chose to have it placed in the reverse direction.
you need to sand down just 2 very small nubs to get the buttstock to accept clips in either direction.
by doing this i'm busting the "blue longshot buttstock can accept a clip in either direction" myth.
both blue and yellow longshot buttstock clip holders only accept clips in one direction unless you shave off those two little nubs.
anyways, by having the clipholder in this direction, it's MUCH easier to work with (cutting is much much much easier) and to me, it's visually alot more pleasing.
My account has been approved (thanks, Phuonguyen!) and so I'm here contributing my first post to this forums.
This is my second version of the Barricade Clipfed Conversion mod, and I would like to thank a friend named "Spartan" for his Longshot buttstock.
Since SGNerf and myself came out with the 1st version of the clipfed mod, many other enthusiasts have created their own versions,
including transplanting the Barricade internals into a Longstrike shell, but the most commonly done version (especially not in our region)
is the one which uses the Raider CS-35 magwell.
If you have seen one, or read about one, you would know that although it is a very secure way of holding your mags onto your barricade,
it requires alot of cutting, especially cutting into the main "body" of the barricade itself, and of course, sacrificing the Raider magwell
which in turn renders the Raider useless since it cannot securely hold a clip any longer, but the biggest gripe that I have with that method
is that you have to load your darts into the clip facing backwards. To me, I would want to carry "universal" clips on me when I go for a war,
so that I can swap clips between any of my on-hand blasters at any time.
The thought of me having to carry clips with darts loaded backwards specially for my Barricade felt like it defeated the whole purpose of converting it to being clip-fed.
Also, there are some versions with the magwell facing the "correct" direction, but that also means that the clip-release button is very close to the trigger, giving you just enough space to squeeze your index fingers in for a trigger squeeze. I've got relatively stubby and chubby fingers so that's a hassle to me too.
So, TGFSpartan!
Along came his longshot buttstock...
and the buttstock means a clip holder...
and along came this version...
and here's the writeup.
Things you need:
- a marker
- Dremel / Drill
- Cutting Bit
- Sanding Bit (optional)
- Small Drill Bit (i used a size big enough for an M3 machine screw)
- Some screws (i used M3)
- some washers or nuts (sizes vary, you'll know why later)
- and if you're extra kiasu since we're Singaporean, some goop / epoxy.
First of all, let's start with the Longshot buttstock.
You only need this much:
with a clip on the inside it will look like this (ala fake cross-section!)
now let's mark it and start cutting away!
now for this part it's a little more intricate:
that's just the first side. then chop the second side till you get something like this:
when you're done it should look something like this:
that done, put whatever's left of the buttstock aside.
Now let's move on to the barricade itself.
open up your barricade and remove the turret (and all little things attached to it.)
then, chop away the bottom "base"!
now, let's look at the internals.
I'll cover some good tricks you might want to apply to your barricade even if you're not going to do this clipfed conversion mod.
However, I'm not going through the switch relocation "trigger on-off" mod, which SGNerf has already kindly done.
Since we're going to have the barricade fire off streamlines, please wrap the flywheels with afew layers of e-tape.
There is no "exact amount" of e-tape to be used. Trial and error, my friend. keep trying until your barricade fires off streamlines.
Every barricade is manufactured with a slight margin of error, so every barricade will require a different amount of e-tape.
For my barricade, it took 2 rounds of my e-tape on each flywheel.
now let's attack the dart pusher piece. if you dont know, it's this piece:
what we're doing here is to get a little more distance out of the dart pusher.
why? so it'll push the darts just that few mm further into the flywheel, of course!
so we're going to sand the "track" till it's a little longer.. just by afew mm!
before:
after:
and that's not all... remove the screw holding the return spring, and stretch the return spring like in the next pic.
oh, and while you're at it, grab some washers (i used 2) and move the screw over to this location:
now your trigger pull will be abit tougher, but the dart pusher will travel a little further!
before you put the dart pusher back, get your drill bit and get ready to drill a hole:
before:
after:
and then attach a screw, and you can add a washer, a bunch of washers, or some nuts, or whatever it is, this will have to be tweaked later.
i know, you're going to say "OMG IT'S OFF-CENTER!!!"
yes i know, and it's done for good reason. you'll find out why later.
now look at the trigger. see that long thing sticking out? that's actually the prong to rotate the turret.
since there's no turret, there shall not be a need for the prong.
you can actually cut the whole thing off till it's flush, but for me, i left that bit because it sits just nicely on the outside of the clip,
it's sort of a "kiasu-ism" thing but you can do without this. it's just me.
Next, let's go remove the irritating "lock" or whatever mechanism it is.
this is the mechanism that forces you to fully squeeze the trigger or it'll just get stuck mid-way.
just unscrew those two silver screws and remove everything that was being held there. yayness.
we're almost there!
now what you need to do, is grab the right side of your "new" clip holder, and do this to the right side of the barricade:
i just used one machine screw. however, if you want that extra strength, go ahead and slap on some epoxy or goop or whatever you want.
do the same for the left side. but, if you realised, the "top wall" of the left half of the barricade shell is higher than the right half.
you need to use some kind of spacers to align the clip holder and the top wall to the other half of the shell.
i used a combination of an m4 nut and 2 small washers.
they gave me the exact amount of space needed. you can't see this in the pic, SORRY!
you can, however, see the space between the top of the clip holder and the top wall.
these pics were taken before i made the "intricate cuts" to the top of the clip holder, that's why there isn't a hole on top like you should have.
it's supposed to be there. sorry for the confusion!
now just fit the two shells together, and look at the bottom. depending on your alignment, you may or may not have to do this:
open it back up, and "test fit" a clip in.
it should look something like this:
now do you know why the hole was drilled off-center?
cos you dont want your screw to go into the little slot at the back of your darts, which defeats the purpose of wanting to extend your dart pusher!
earlier i mentioned that you need to tweak the config of your dart pusher. trial and error again, my friend.
find a combination that is good enough to not impede on the darts moving up from the clip, while being able to push the darts into the flywheels.
i ended up using an m3 screw with one single washer. yours will probably be different.
close it back up, and you're done!
now you have a mean looking clipfed Barricade!
Next step, go nuts and make two so you can be "Automatic Clipfed Akimbo Barricader"!!
yes, it holds 6-dart clips, 18-dart clips, and 18-drum mags very well.
Demo video time!
now go convert your own Barricade!!!
hahahah...
EDIT: Okay i've got an update on my barricade -
Since i was playing around with my barricade and trying to tweak it's effeciency,
i've done something to the flywheel system and the dart pusher system so that now, virtually no darts get stuck or get caught on the dart pusher on it's return after firing a shot.
For those of you familiar with the Barricade, look into the entrance (where the darts enter) of the flywheel box, and you'll see two "guides" before the flywheels.
Most of the time, clipfed Barricades see the darts being pushed just a little short of the flywheels. Extending the dart pusher any longer will block subsequent darts from coming out of the clip...
So my solution?
I cut off the lower "guide" at the entrance of the flywheel box, wrapped the lower flywheel with a ton of e-tape (since it was also the guide that limited how much e-tape you could wrap on the flywheels), and did absolutely NOTHING to the dart pusher.
Now what happens is that the darts get pushed into the flywheel box, and instead of meeting with the guides, they meet with the lower flywheel first, which in turn, helps to pull it in all the way.
I've got a number of nerf enthusiasts try out my clipfed barricade and there were no mis-firings thus far
-----------------------------------------------------------------
update:
Okay so here's my own rev 2.5,
because it's basically using a longshot buttstock clipholder but i chose to have it placed in the reverse direction.
you need to sand down just 2 very small nubs to get the buttstock to accept clips in either direction.
by doing this i'm busting the "blue longshot buttstock can accept a clip in either direction" myth.
both blue and yellow longshot buttstock clip holders only accept clips in one direction unless you shave off those two little nubs.
anyways, by having the clipholder in this direction, it's MUCH easier to work with (cutting is much much much easier) and to me, it's visually alot more pleasing.
Last edited by psyk on Tue Mar 15, 2011 10:49 am; edited 1 time in total (Reason for editing : Updated to feature Rev. 2.5)