

Before we get started, I pulled everything apart and went through how I could enhance it, make it better. So this process could be streamlined, and some things that I will go through the disassembly of is unnecessary, but for the sake of being thorough, I will go through it anyway.
ADDENDUM: I actually finished modding this at section "07." Then I put the blaster back together, and noticed that my o-ring seal was too much and the blaster fired a few feet, so I went and did a spring upgrade. I tacked what I did, on to the end of this guide, so read it through first then decide what you want to do. I will label some parts "OPTIONAL." these parts are, as you guessed it, optional and do not need to be done at all.
Section:
00. Disassembly.
01. Dart peg removal.
02. AR removal.
03. Enhanced turret seal.
04. Plunger tube seal.
05. Plunger head buffering.
06. Enhanced O-ring seal.
07. Spring arm trim.
08. Assembly.
ADDENDUM:
09. Spring upgrade.
Things you will need:
01. Phillips screwdriver.
02. Flat head screwdriver, wider is better.
03. Pliers (wire cutter variety).
04. Rotary tool and grinding or sanding tip.
05. Material for turret seal. I used Oznerfnerd's recoil pads.
06. Glue that provides an airtight seal, I used silicon glue.
07. Your preference for buffer material.
08. Preferred plunger tape.
ADDENDUM:
09. Spring
10. Heavy duty wire cutters.
11. Thick shafted screwdriver.
12. Good pair of pliers.
Section: 00.
Disassembly.
First of all, here is the blaster:

Take your phillips head screw driver and take out all the screws, I am pretty sure all the screws are the same, but just in case use your preferred method for remembering what screws go where. I use blu-tac, pretty simple and it is re-usable.

Simply pull the shell apart, you may have a little trouble with the handle, just use something to lever it apart, my grey trigger had trouble, but the orange one didn't. Take note of the spring loaded n-strike rail system catch, none of mine jumped out, and I left them in, but you might not be so lucky.

Pull out the turret, nothing here should jump out at you. The orange piece that acts as the pivot for the rear of the turret can come out freely. It's your choice if you want to pull it out now or leave it in. I tend to remove it, but that is shown later, and my only reason for removing it is so I can put it somewhere safe.

Nothing much here, just setting the turret aside for now.

Pull the guts out of the shell, and set the shell aside for the time being.


OPTIONAL.
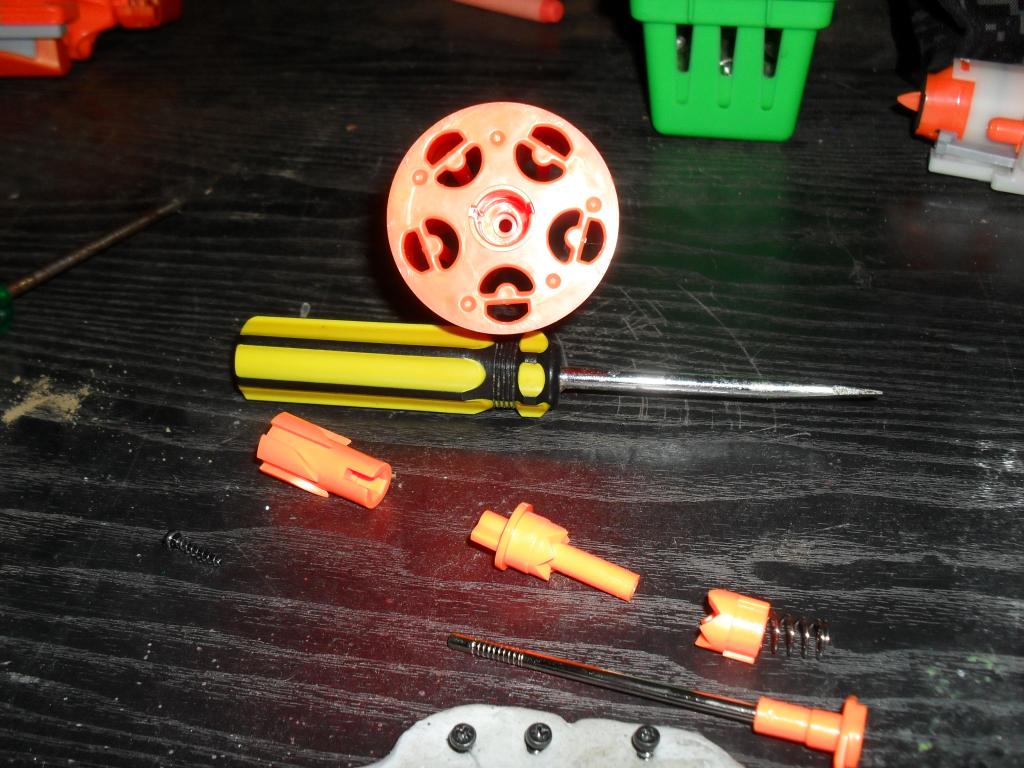
I pulled apart the entire turret mechanism just to see how it works, if you want to do this you can, it doesn't really serve a purpose, depending on your rotary tool you may need to remove just the first part that is screwed in, or you may feel safer to remove the whole thing.
This is the back of the turret as well as the turret mechanism, this screw you can see, undo that. You will need to hold the part while you do it, as it will just keep turning if you just hold the turret itself. Once the screw is out you can just pull the 'gear' part off, and that will leave the clutch inside the turret.
Now grab your flat head screwdriver, and lever the back off of the clutch assembly, it shouldn't be too hard, just be careful not to damage this part, as it is part of what the turret rotates on while in the shell. Once the clutch part is free, everything should be able to come out freely. The following pic shows how they all go together, so if you forget feel free to reference it.
Put it back together as needed, make sure that the last part (that you levered out to get it apart) isn't forced all the way down, because the turret needs to be able to move back and forward a little bit when the entire mechanism is primed. The first mod that will be listed will be the peg removal and clean-up of the turret, so bear that in mind when you consider when to put it back together.
/OPTIONAL
Grab the guts that you took out of the shell, note the retaining piece that holds three screws. It holds the trigger and hammer in place.

You want to remove these screws, and then remove the retaining piece. Be mindful of the trigger, and the spring right underneath it, both of the times that I pulled one of these blasters apart for the first time, the trigger and spring both tried to escape. I have made sure they are both still in for this picture, so you can see how they go in, but if they fly out for you then feel free to leave them out. This is also when I chose to remove the peg that the turret slides on to, you don't have to.
Firstly, remove the trigger AND spring together, otherwise you might lose the spring as it fires off in a random direction.
The next thing we are going to remove is the hammer part. (Or more accurately the hammer-plunger-spring retaining peg part, I will call this the hammer for convenience sake.) To remove this the first thing we do is to gently lift the spring retaining peg up and to the right so we can also get the spring off. Now gently lift up the centre of the hammer off of its pivot point, and pull the entire part clear of the plunger tube. If you have trouble with this I can upload a picture of the progression instead of the end result, but it isn't complicated.
Also, on the reverse side, there is a spring that holds the grey L-shaped turret moving part, you don't need to remove this, but it may fall off whilst removing the hammer section.

Congratulations, you now have a disassembled Hammershot. On to the next section.
Section: 01.
Dart peg removal.
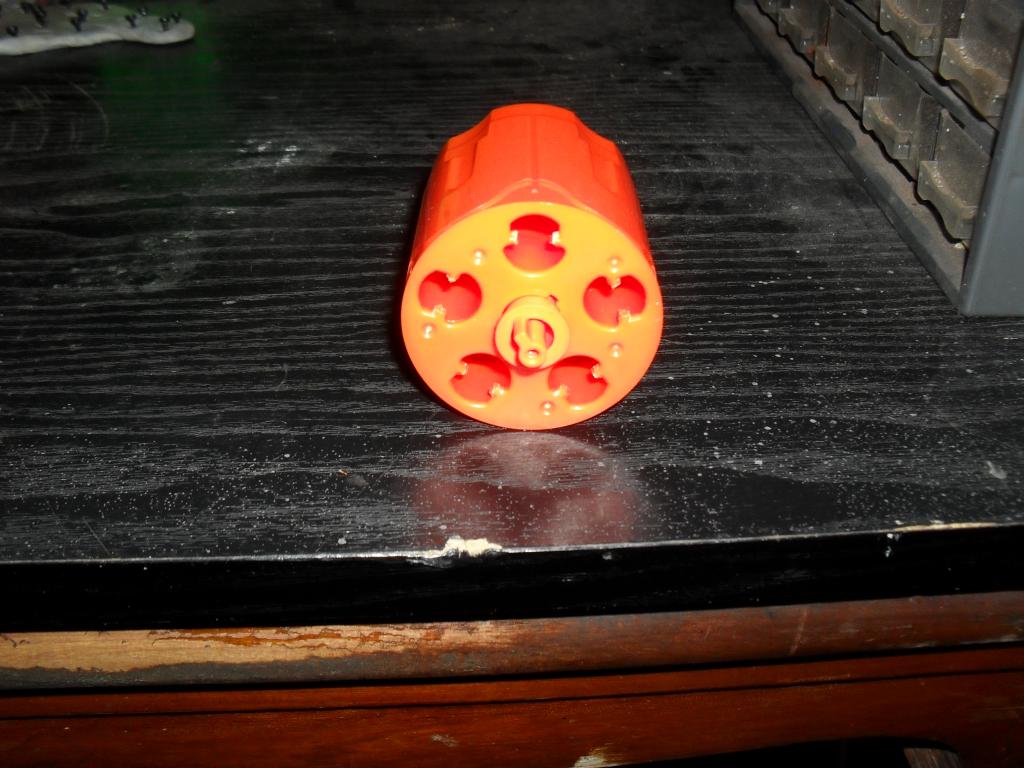
Since we are going to be modifying the turret, you need to grab the turret.

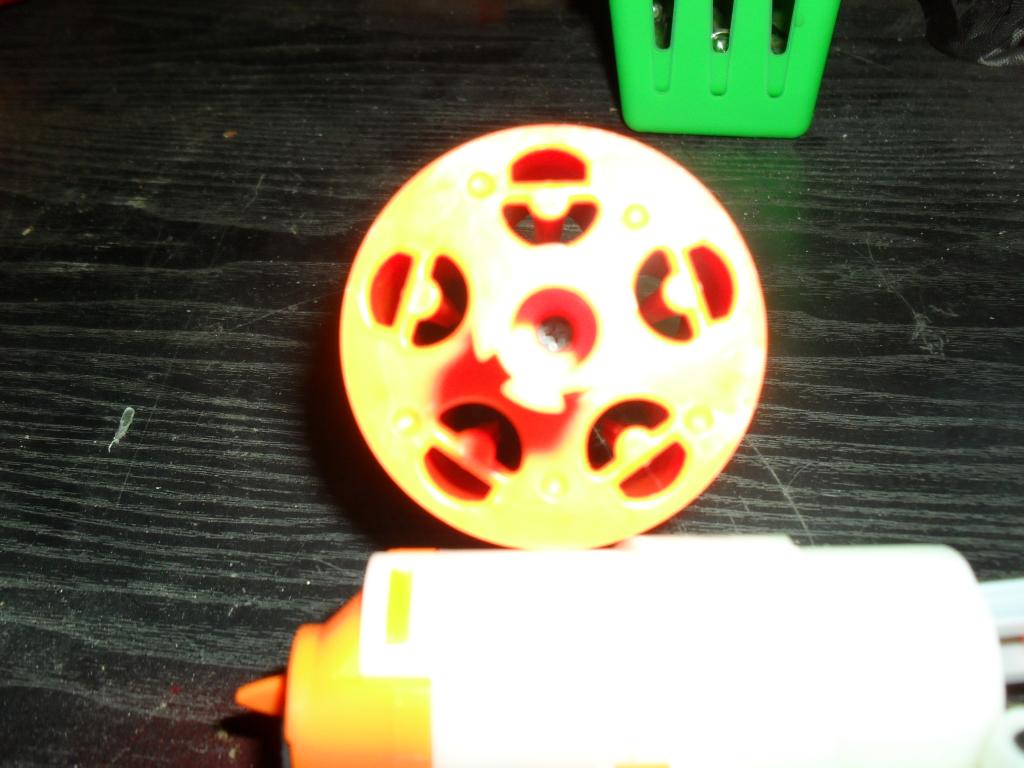
First, grab your pair of side cutters. Carefully cut both sides of each dart peg, situated at the rear of the turret. It should look like this.
Now get your rotary tool and power the sucker up, use either a grinding or sanding tip to smooth out the holes in the rear of the turret. I went so far as to make the holes in the rear of the turret circular, but to leave enough material so that I don't accidentally stick a dart in too far. It's not like I could make this rear loading or anything. In any event, this part is up to you, it only needs to be flat and smooth, so make it so.

That is it for the turret. If you left any parts off of it, put them back on now and set it aside.
Section: 02.
AR removal.
You have a few options on how you want to do this, I chose to drill out the first one (which I think might have been a mistake), and pull apart the second one, since my ultimate aim for this is to make it as good as possible whilst maintaining it's strong points I will go into the second method. Also, I did end up removing the plunger tube from the chassis to make things easier, but I won't go into that as it was a little tricky. If you want to, go ahead. You will need your flat head screw driver, I also used my thumbnail, if this is not an option for you then you may need a second flat head screwdriver. Carefully bend the white retaining tabs away from the tube, and use your thumbnail to push the orange piece up. This first side is usually the easiest, but you need to do this to BOTH sides, you can't just expose one side and then pull, as you will damage the tabs holding it in place. End result:
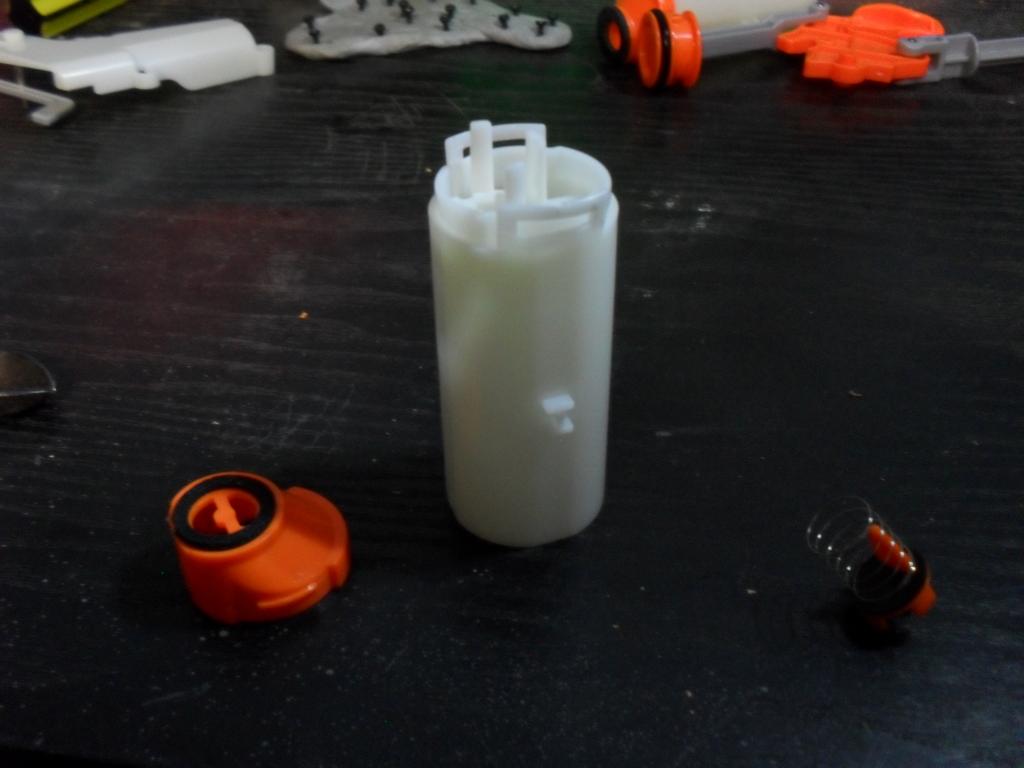
You can discard or keep the air restrictor part and spring as you like.
I chose to cut the bar out of the centre of the plunger tube cap, then smoothed out the hole using a rotary tool. If you do this then be careful of the foam sealing material, unless you want to replace it like I did.

I will go into the reason why I think drilling out the AR would be a mistake, as the next part depends on what you want most. Drilling out the AR compromises the plastic plate that backs up the AR, and if you want to pad the plunger head then this part is what the buffer will push up against near the end of travel. You could pad around just the edge of the plunger head, but the amount of contact with the edge of the plunger tube is not as much as I personally would like. However, if you go for smooth air flow as important you may want to remove this part entirely. All I did was to remove the pegs that help hold the AR in place.

We are finished with the plunger tube for now, but keep the orange part for the next bit.
Section: 03.
Enhanced turret seal.
This mod has a noticeable trade-off, once you are done, if you do this mod you will notice that the turret is much more difficult to rotate while the blaster is unprimed, but it will still rotate perfectly well while priming. You can still rotate it while unprimed, but the resistance is much higher.
Remove the foam that is currently glued in place, it should not be difficult.

Depending on what you are using as a turret seal, you may need to cut the plastic off that was surrounding the stock foam seal. Or you can cut the sealing material to suit, whatever you prefer, I cut then sanded the plastic. It is actually much cleaner than it appears in the photo.

I used Oznerfnerd's recoil pads, that I have a few spares of, as my turret seal material. So I just used a hole punch to knock the centre out and stuck the pad on using it's own glue. Whatever you do though, make sure that the material you use does not sit out over the bottom lip of the plunger tube head. Otherwise the tube won't move backwards, and the turret will jam.
I don't seem to have a picture of my end result for some reason, but again I can upload one if needed. Now on to the next bit.
Section: 04.
Plunger tube seal.
The stock seal between the orange head and white plastic tube is not particularly great, even under low pressure it leaks noticeably. So we are going to seal it with glue, what you use is up to you, but I would recommend something that will create an airtight seal.
I don't have a picture of this bit, because I used a quick drying silicon glue and you can't see it from any of the pictures I took. But, if you can't glue two things together cleanly without a picture guide, then stop reading this, turn off your computer and learn some damn practical skills.
Section: 05, 06, 07.
Plunger head buffering, enhanced O-ring seal, spring arm trim.
The next three are sort of mashed together, since they are pretty simple and straight forward.
05. Depending on what options you have taken, depends where you want padding now. I was inclined to pad the entire plunger head, but I did punch out the centre first so that the contact area was all flats. I would likely use a large pad and just make sure the outside matched the plunger head.
06. Take the o-ring off, clean off the grease, apply a thin layer or two of tape, test fit in the plunger tube, make sure it slides freely.
EDIT: I do not recommend messing around with the o-ring seal. After pulling apart my blaster and removing the tape, I noticed that the o-ring seal as standard was pretty good already, the only reason I thought it wasn't was because the plunger tube wasn't sealed.
07. One thing I have noticed, after modding, if the blaster is left alone for a little while it kind of locks up. You can remedy it with a half prime then a full one. So I thought that this was caused by the spring arm being out of alignment, so I decided to trim it down. HOWEVER after assembly and repeated testing/use the issue still occurs, so either I did not mod it enough or it is something else.

SO that is it for this version of my mod guide, I do have further plans for this blaster down the track, and I will update as neccessary, the reason why I have not gone through a 'penny' mod style of thing, is because I did not do that with this grey trigger model, as the spring is pathetic so it would only make it slightly less pathetic. I will be doing a spring upgrade though, and I would reccomend doing that instead. So let's put the blaster back together.
Section: 08.
Assembly.
If you decided to take out the plunger tube, put it back in first. Stick the plunger head in the plunger tube, gently push it in all the way, then line up the hammer with it's pivot point and ease it down the metal rod. It is quite fiddly the first time, but does not require much force, so don't force it. Make sure that the turret arm is all the way back behind the peg on the right side of the hammer part, otherwise your turret won't rotate when you prime. You will want to leave the spring off for now.

Next up is the trigger, this can be tricky as the spring is a pain, and even while the trigger is at rest the spring has to be partially compressed. Usually the easiest way to get this all into place, put the spring down first, look at the photo if you are unsure where the resting arm of the spring sits. Line the trigger up and slide it down so that it lines up and the moving spring arm sits in the hole in the trigger. Pull the hammer all the way back and swing the trigger in to place. Depending on fit you may have to hold the trigger down and get the plate in to place.

Put the plastic retaining piece in to place. Screw it down.
Now is a good time to test fire, make sure everything moves properly and freely. Also would be a good time to put the rear most turret part back in.
Next is to put the spring in, lift the arm, slide the spring up. If you have a stronger spring you may need to use a screwdriver to lever the spring properly in to place. Once the spring is set, test fire a few times, take what precautions you wish in regards to dry firing.

Put the guts back into the blaster shell.

Stick the turret in. Depending on your padding of choice, there might be a little bit of an issue with fit. The piece at the front of the turret, that looks like a trapezoid, the widest part goes to the bottom. Neither of mine like to go in properly after modding, but once the shell is together it all works fine.

Put everything back together, and go play with your new toy.

ADDENDUM
Section: 09.
This was done after my first batch of modding, hence why it is input after. I got my spring at a sort of specialty shop called Porters, that operates in Toowoomba but the spring should be available elsewhere as well.
In this picture it shows:
1. Original GREY trigger spring.
2. C239 spring cut into two parts.
3. C239 spring, uncut and in original packaging.

Cut spring installed.

Cut spring installed and primed.

I cut the spring, as you can see. If you want to do the same thing you may be able to get it in and working without cutting it. I did have to lever this spring in with a large flat head screwdriver.
The spring itself is quite strong, much stronger than a compressed orange trigger. There are no stress marks after two weeks in the blaster, no unusual sounds or mannerisms due to the added load. Still one hand primeable, but that would depend on the individual I suppose.
The next thing I plan on, is a barrel replacement using hep20, or maybe brass if I get it in time.
ADDENDUM: I actually finished modding this at section "07." Then I put the blaster back together, and noticed that my o-ring seal was too much and the blaster fired a few feet, so I went and did a spring upgrade. I tacked what I did, on to the end of this guide, so read it through first then decide what you want to do. I will label some parts "OPTIONAL." these parts are, as you guessed it, optional and do not need to be done at all.
Section:
00. Disassembly.
01. Dart peg removal.
02. AR removal.
03. Enhanced turret seal.
04. Plunger tube seal.
05. Plunger head buffering.
06. Enhanced O-ring seal.
07. Spring arm trim.
08. Assembly.
ADDENDUM:
09. Spring upgrade.
Things you will need:
01. Phillips screwdriver.
02. Flat head screwdriver, wider is better.
03. Pliers (wire cutter variety).
04. Rotary tool and grinding or sanding tip.
05. Material for turret seal. I used Oznerfnerd's recoil pads.
06. Glue that provides an airtight seal, I used silicon glue.
07. Your preference for buffer material.
08. Preferred plunger tape.
ADDENDUM:
09. Spring
10. Heavy duty wire cutters.
11. Thick shafted screwdriver.
12. Good pair of pliers.
Section: 00.
Disassembly.
First of all, here is the blaster:

Take your phillips head screw driver and take out all the screws, I am pretty sure all the screws are the same, but just in case use your preferred method for remembering what screws go where. I use blu-tac, pretty simple and it is re-usable.

Simply pull the shell apart, you may have a little trouble with the handle, just use something to lever it apart, my grey trigger had trouble, but the orange one didn't. Take note of the spring loaded n-strike rail system catch, none of mine jumped out, and I left them in, but you might not be so lucky.

Pull out the turret, nothing here should jump out at you. The orange piece that acts as the pivot for the rear of the turret can come out freely. It's your choice if you want to pull it out now or leave it in. I tend to remove it, but that is shown later, and my only reason for removing it is so I can put it somewhere safe.

Nothing much here, just setting the turret aside for now.

Pull the guts out of the shell, and set the shell aside for the time being.


OPTIONAL.
I pulled apart the entire turret mechanism just to see how it works, if you want to do this you can, it doesn't really serve a purpose, depending on your rotary tool you may need to remove just the first part that is screwed in, or you may feel safer to remove the whole thing.
This is the back of the turret as well as the turret mechanism, this screw you can see, undo that. You will need to hold the part while you do it, as it will just keep turning if you just hold the turret itself. Once the screw is out you can just pull the 'gear' part off, and that will leave the clutch inside the turret.

Now grab your flat head screwdriver, and lever the back off of the clutch assembly, it shouldn't be too hard, just be careful not to damage this part, as it is part of what the turret rotates on while in the shell. Once the clutch part is free, everything should be able to come out freely. The following pic shows how they all go together, so if you forget feel free to reference it.

Put it back together as needed, make sure that the last part (that you levered out to get it apart) isn't forced all the way down, because the turret needs to be able to move back and forward a little bit when the entire mechanism is primed. The first mod that will be listed will be the peg removal and clean-up of the turret, so bear that in mind when you consider when to put it back together.
/OPTIONAL
Grab the guts that you took out of the shell, note the retaining piece that holds three screws. It holds the trigger and hammer in place.

You want to remove these screws, and then remove the retaining piece. Be mindful of the trigger, and the spring right underneath it, both of the times that I pulled one of these blasters apart for the first time, the trigger and spring both tried to escape. I have made sure they are both still in for this picture, so you can see how they go in, but if they fly out for you then feel free to leave them out. This is also when I chose to remove the peg that the turret slides on to, you don't have to.
Firstly, remove the trigger AND spring together, otherwise you might lose the spring as it fires off in a random direction.
The next thing we are going to remove is the hammer part. (Or more accurately the hammer-plunger-spring retaining peg part, I will call this the hammer for convenience sake.) To remove this the first thing we do is to gently lift the spring retaining peg up and to the right so we can also get the spring off. Now gently lift up the centre of the hammer off of its pivot point, and pull the entire part clear of the plunger tube. If you have trouble with this I can upload a picture of the progression instead of the end result, but it isn't complicated.
Also, on the reverse side, there is a spring that holds the grey L-shaped turret moving part, you don't need to remove this, but it may fall off whilst removing the hammer section.

Congratulations, you now have a disassembled Hammershot. On to the next section.
Section: 01.
Dart peg removal.
Since we are going to be modifying the turret, you need to grab the turret.

First, grab your pair of side cutters. Carefully cut both sides of each dart peg, situated at the rear of the turret. It should look like this.

Now get your rotary tool and power the sucker up, use either a grinding or sanding tip to smooth out the holes in the rear of the turret. I went so far as to make the holes in the rear of the turret circular, but to leave enough material so that I don't accidentally stick a dart in too far. It's not like I could make this rear loading or anything. In any event, this part is up to you, it only needs to be flat and smooth, so make it so.

That is it for the turret. If you left any parts off of it, put them back on now and set it aside.
Section: 02.
AR removal.
You have a few options on how you want to do this, I chose to drill out the first one (which I think might have been a mistake), and pull apart the second one, since my ultimate aim for this is to make it as good as possible whilst maintaining it's strong points I will go into the second method. Also, I did end up removing the plunger tube from the chassis to make things easier, but I won't go into that as it was a little tricky. If you want to, go ahead. You will need your flat head screw driver, I also used my thumbnail, if this is not an option for you then you may need a second flat head screwdriver. Carefully bend the white retaining tabs away from the tube, and use your thumbnail to push the orange piece up. This first side is usually the easiest, but you need to do this to BOTH sides, you can't just expose one side and then pull, as you will damage the tabs holding it in place. End result:

You can discard or keep the air restrictor part and spring as you like.
I chose to cut the bar out of the centre of the plunger tube cap, then smoothed out the hole using a rotary tool. If you do this then be careful of the foam sealing material, unless you want to replace it like I did.

I will go into the reason why I think drilling out the AR would be a mistake, as the next part depends on what you want most. Drilling out the AR compromises the plastic plate that backs up the AR, and if you want to pad the plunger head then this part is what the buffer will push up against near the end of travel. You could pad around just the edge of the plunger head, but the amount of contact with the edge of the plunger tube is not as much as I personally would like. However, if you go for smooth air flow as important you may want to remove this part entirely. All I did was to remove the pegs that help hold the AR in place.

We are finished with the plunger tube for now, but keep the orange part for the next bit.
Section: 03.
Enhanced turret seal.
This mod has a noticeable trade-off, once you are done, if you do this mod you will notice that the turret is much more difficult to rotate while the blaster is unprimed, but it will still rotate perfectly well while priming. You can still rotate it while unprimed, but the resistance is much higher.
Remove the foam that is currently glued in place, it should not be difficult.

Depending on what you are using as a turret seal, you may need to cut the plastic off that was surrounding the stock foam seal. Or you can cut the sealing material to suit, whatever you prefer, I cut then sanded the plastic. It is actually much cleaner than it appears in the photo.

I used Oznerfnerd's recoil pads, that I have a few spares of, as my turret seal material. So I just used a hole punch to knock the centre out and stuck the pad on using it's own glue. Whatever you do though, make sure that the material you use does not sit out over the bottom lip of the plunger tube head. Otherwise the tube won't move backwards, and the turret will jam.
I don't seem to have a picture of my end result for some reason, but again I can upload one if needed. Now on to the next bit.
Section: 04.
Plunger tube seal.
The stock seal between the orange head and white plastic tube is not particularly great, even under low pressure it leaks noticeably. So we are going to seal it with glue, what you use is up to you, but I would recommend something that will create an airtight seal.
I don't have a picture of this bit, because I used a quick drying silicon glue and you can't see it from any of the pictures I took. But, if you can't glue two things together cleanly without a picture guide, then stop reading this, turn off your computer and learn some damn practical skills.
Section: 05, 06, 07.
Plunger head buffering, enhanced O-ring seal, spring arm trim.
The next three are sort of mashed together, since they are pretty simple and straight forward.
05. Depending on what options you have taken, depends where you want padding now. I was inclined to pad the entire plunger head, but I did punch out the centre first so that the contact area was all flats. I would likely use a large pad and just make sure the outside matched the plunger head.
06. Take the o-ring off, clean off the grease, apply a thin layer or two of tape, test fit in the plunger tube, make sure it slides freely.
EDIT: I do not recommend messing around with the o-ring seal. After pulling apart my blaster and removing the tape, I noticed that the o-ring seal as standard was pretty good already, the only reason I thought it wasn't was because the plunger tube wasn't sealed.
07. One thing I have noticed, after modding, if the blaster is left alone for a little while it kind of locks up. You can remedy it with a half prime then a full one. So I thought that this was caused by the spring arm being out of alignment, so I decided to trim it down. HOWEVER after assembly and repeated testing/use the issue still occurs, so either I did not mod it enough or it is something else.

SO that is it for this version of my mod guide, I do have further plans for this blaster down the track, and I will update as neccessary, the reason why I have not gone through a 'penny' mod style of thing, is because I did not do that with this grey trigger model, as the spring is pathetic so it would only make it slightly less pathetic. I will be doing a spring upgrade though, and I would reccomend doing that instead. So let's put the blaster back together.
Section: 08.
Assembly.
If you decided to take out the plunger tube, put it back in first. Stick the plunger head in the plunger tube, gently push it in all the way, then line up the hammer with it's pivot point and ease it down the metal rod. It is quite fiddly the first time, but does not require much force, so don't force it. Make sure that the turret arm is all the way back behind the peg on the right side of the hammer part, otherwise your turret won't rotate when you prime. You will want to leave the spring off for now.

Next up is the trigger, this can be tricky as the spring is a pain, and even while the trigger is at rest the spring has to be partially compressed. Usually the easiest way to get this all into place, put the spring down first, look at the photo if you are unsure where the resting arm of the spring sits. Line the trigger up and slide it down so that it lines up and the moving spring arm sits in the hole in the trigger. Pull the hammer all the way back and swing the trigger in to place. Depending on fit you may have to hold the trigger down and get the plate in to place.

Put the plastic retaining piece in to place. Screw it down.
Now is a good time to test fire, make sure everything moves properly and freely. Also would be a good time to put the rear most turret part back in.
Next is to put the spring in, lift the arm, slide the spring up. If you have a stronger spring you may need to use a screwdriver to lever the spring properly in to place. Once the spring is set, test fire a few times, take what precautions you wish in regards to dry firing.

Put the guts back into the blaster shell.

Stick the turret in. Depending on your padding of choice, there might be a little bit of an issue with fit. The piece at the front of the turret, that looks like a trapezoid, the widest part goes to the bottom. Neither of mine like to go in properly after modding, but once the shell is together it all works fine.

Put everything back together, and go play with your new toy.

ADDENDUM
Section: 09.
This was done after my first batch of modding, hence why it is input after. I got my spring at a sort of specialty shop called Porters, that operates in Toowoomba but the spring should be available elsewhere as well.
In this picture it shows:
1. Original GREY trigger spring.
2. C239 spring cut into two parts.
3. C239 spring, uncut and in original packaging.

Cut spring installed.

Cut spring installed and primed.

I cut the spring, as you can see. If you want to do the same thing you may be able to get it in and working without cutting it. I did have to lever this spring in with a large flat head screwdriver.
The spring itself is quite strong, much stronger than a compressed orange trigger. There are no stress marks after two weeks in the blaster, no unusual sounds or mannerisms due to the added load. Still one hand primeable, but that would depend on the individual I suppose.
The next thing I plan on, is a barrel replacement using hep20, or maybe brass if I get it in time.
Last edited by Kaine on Thu Nov 28, 2013 10:19 am; edited 2 times in total (Reason for editing : Significant mistake)