

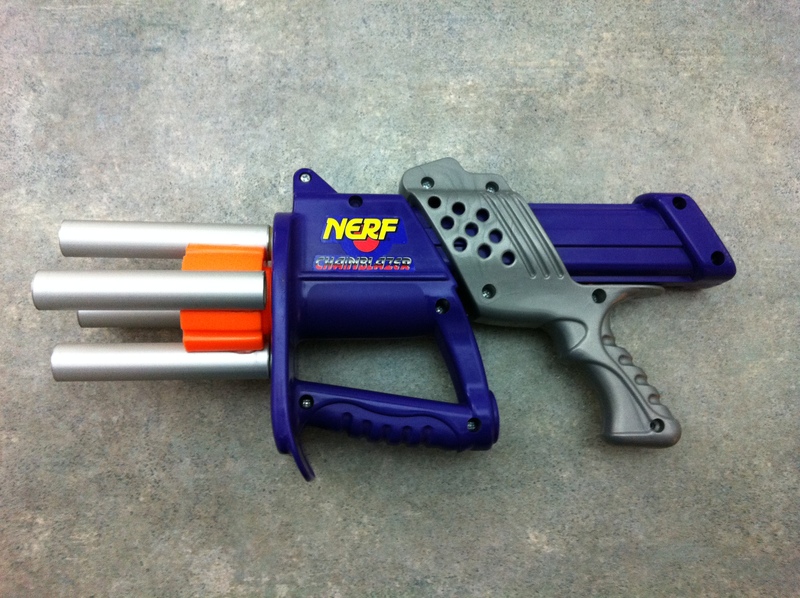
Okay, since there seems to be a bunch of rare vintage blasters being modded and overhauled lately (Rogue's Lightning Blitz, pSyk's Tech Target and Sawtooth, Drac's Defender 3 Pistol, Knd/Ace's original release NiteFinder), I thought I'd follow suit with a lesser known blaster from 1994, the ChainBlazer. A kind of mini-Arrowstorm.

I found this during one of my thrift store hunts. The orange cover flap was missing and it wasn't priming properly. But what was cool was that it actually had the chain....although I won't be using it.
Upon opening it up, I was able to determine why it wasn't priming properly. The hook for the return spring on the plunger tube catch was broken. Meaning, that since the plunger tube failed to return before the plunger catch released, no air was being directed towards the dart.
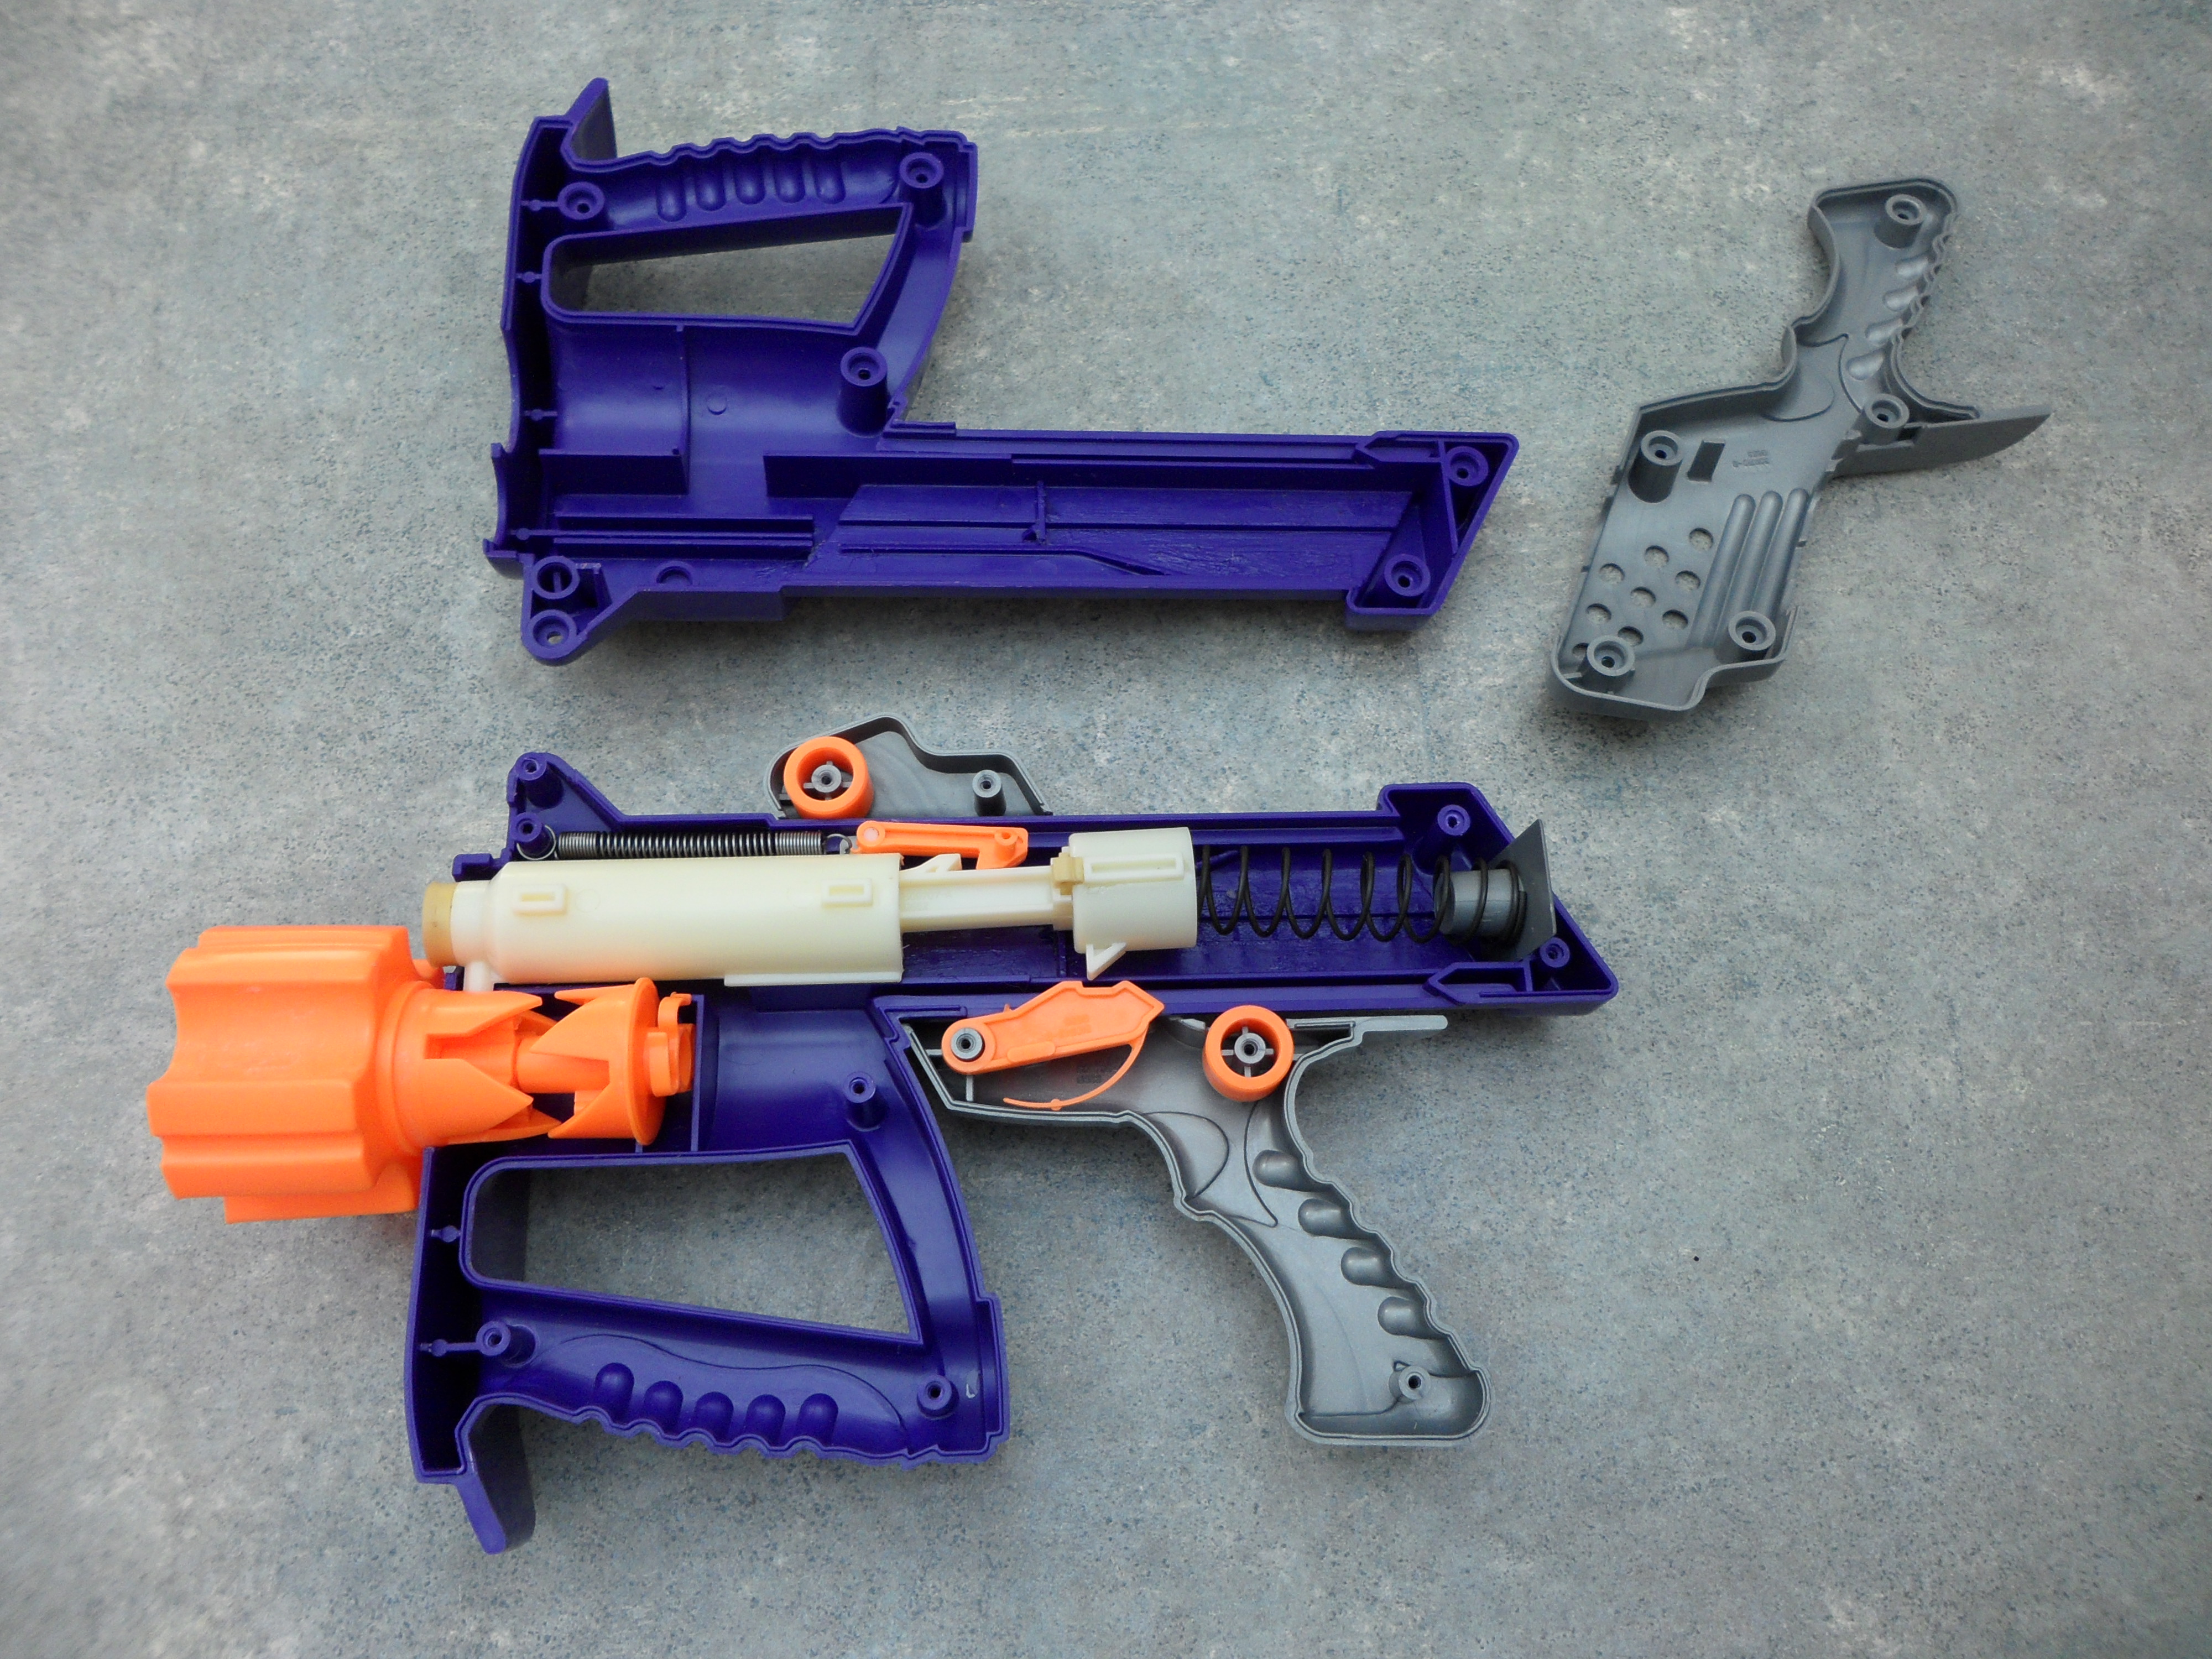


An easy fix for this was to Dremel a small hole in the support for the plunger tube catch.

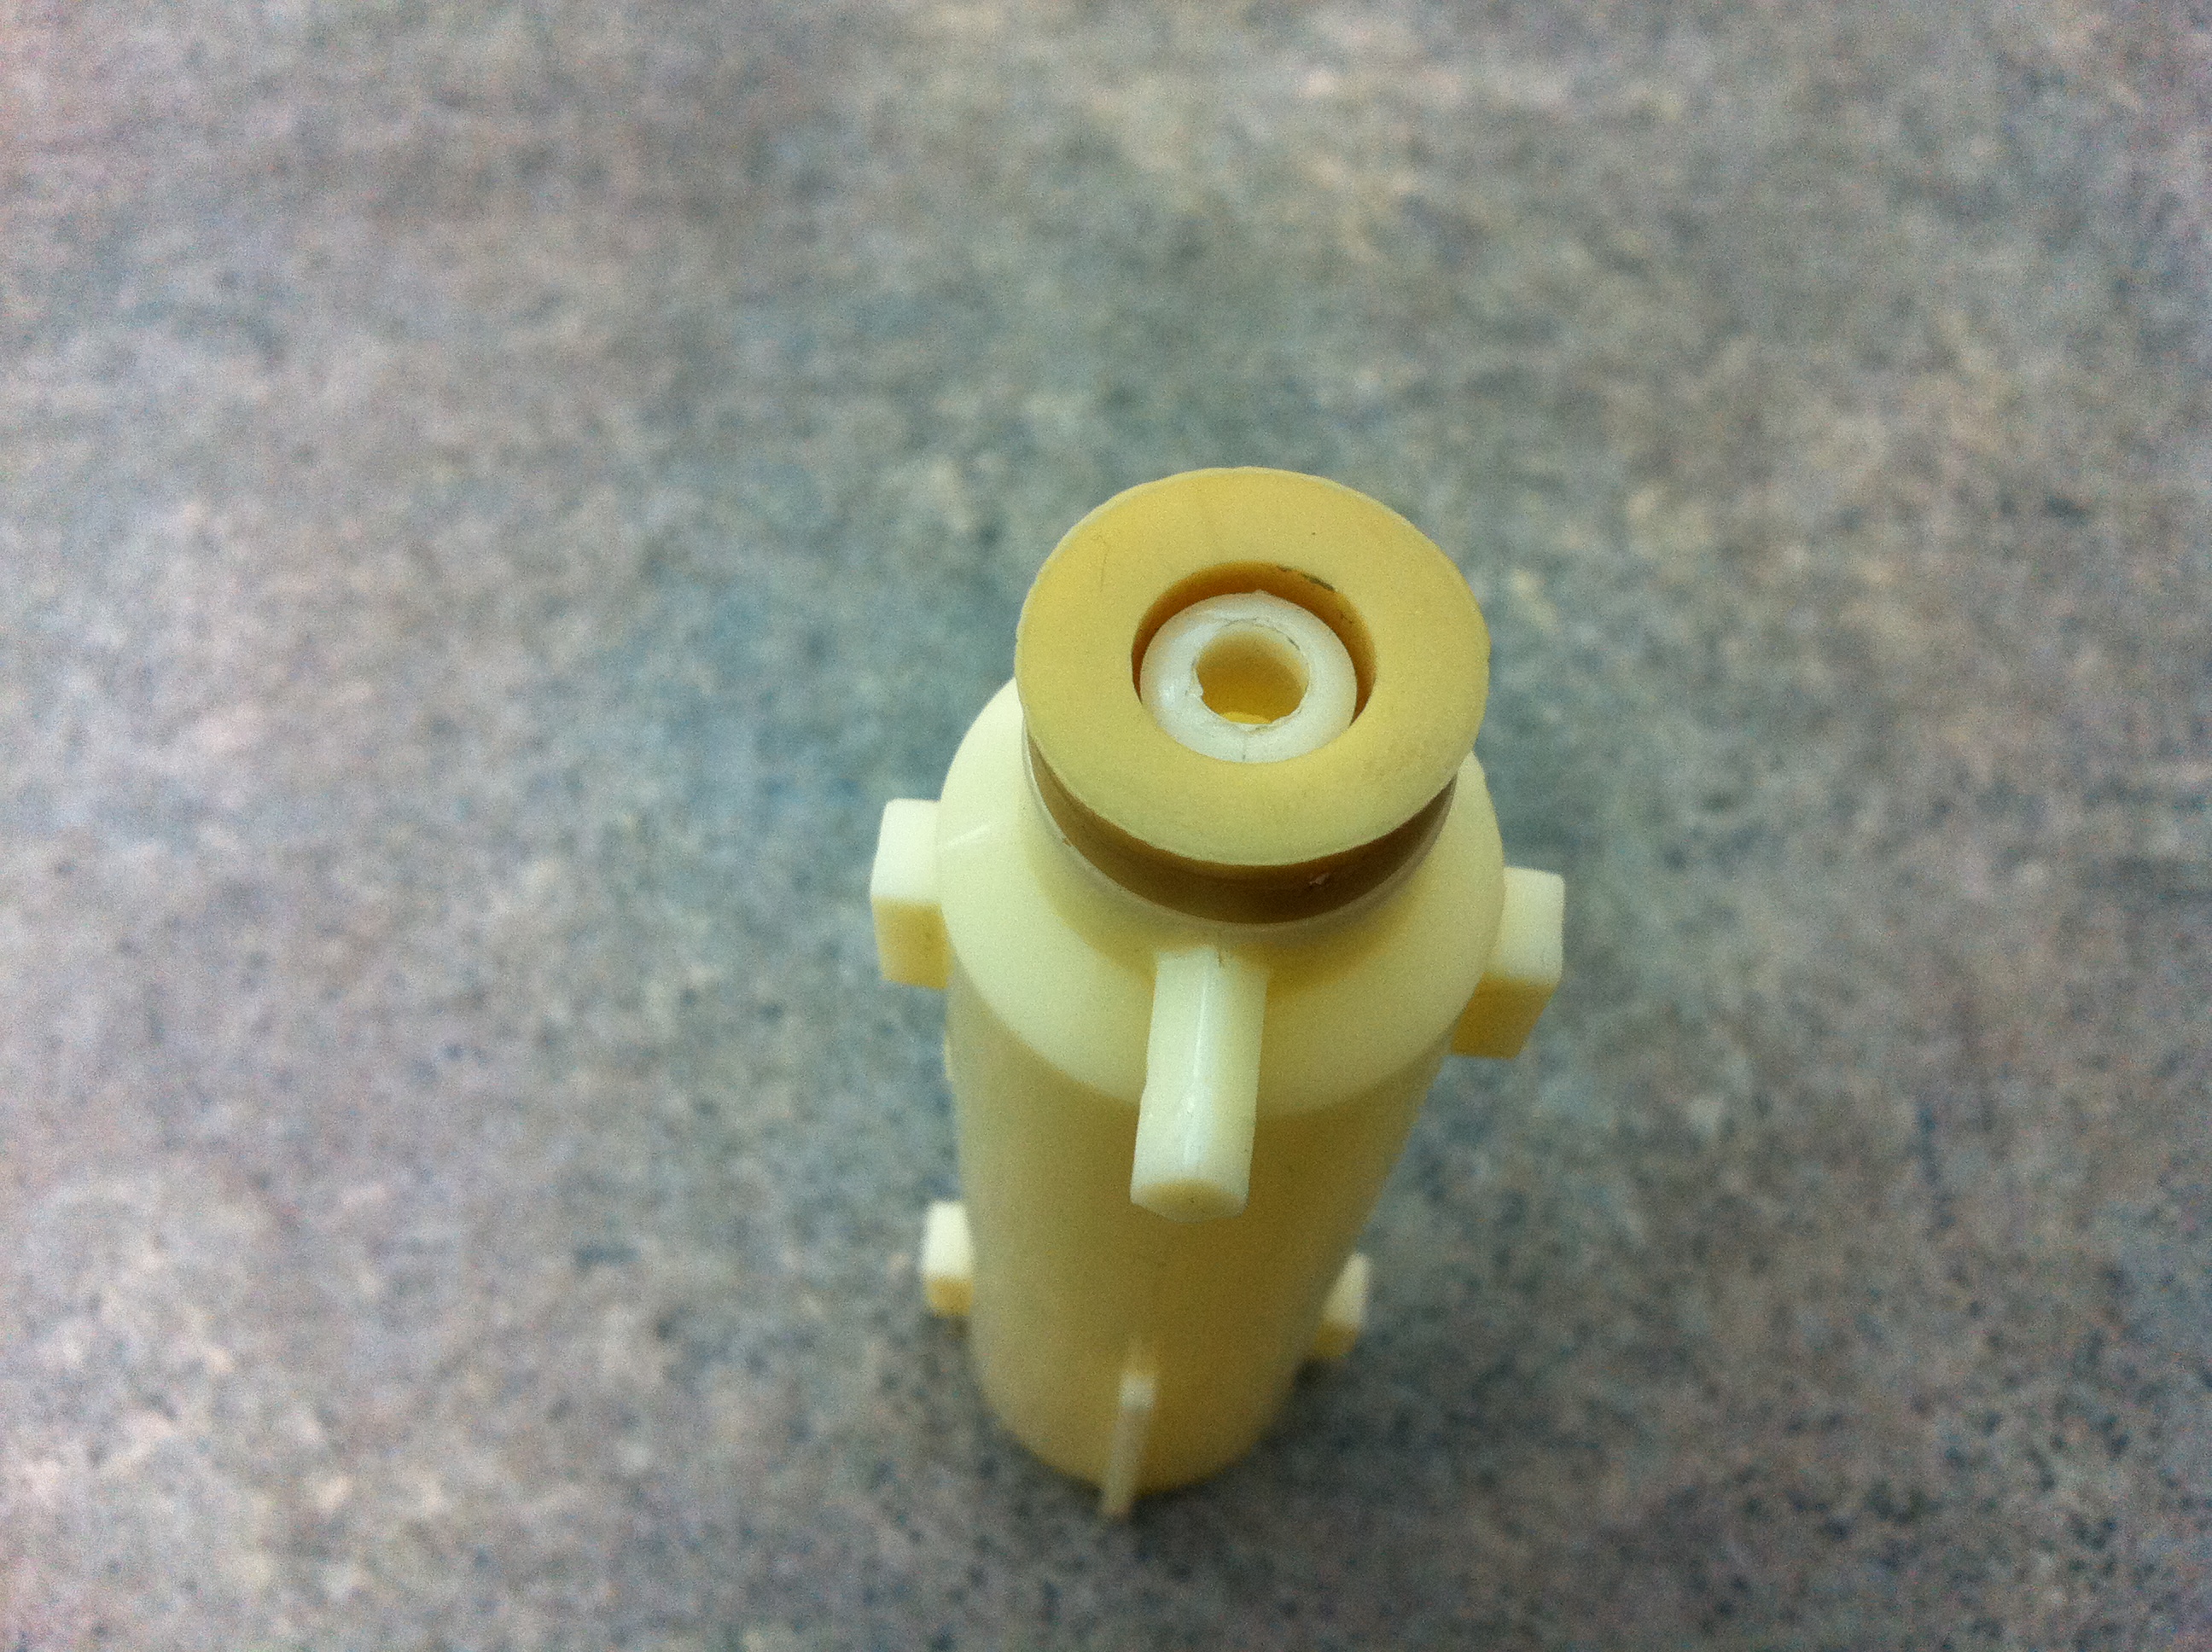
Moving on to the plunger tube itself, I opened up the hole ever so slightly using a Dremel. And using a toothpick, I sealed the gap between the rubber gasket and the plunger tube hole.
-before

-after
The plunger has a skirt style plunger head. I Just put hotglue within the crevice to help push it a little wider creating a better seal.

The stock spring is actually pretty strong for this blaster so I chose not to replace it with something stronger. Therefore I also decided not to do anything to the very interesting catch mechanism.
What I did do, however, was cut a small piece of 1/2 inch PVC to pre-compress the spring a little more.


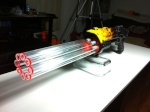
After putting it back together and testing it out, I moved on to the turret and barrels. Frost Vectron did something very similar WAAAAYYYY back but he used pieces of 1/2 PVC and CPVC.
I chose to use 3/4 inch aluminum with 1/2 inch CPVC nested inside. My reason for this is 2 fold as you'll soon see. The aluminum sheaths have been cut to a length of 4.2 inches. The CPVC were all cut to 4 inches.

The CPVC nests perfectly inside the 3/4 inch aluminum (breech potential). Frost had to shave down the pieces of PVC for the CPVC to nest in porperly. The aluminum tubing made this much easier. I also used a pair of scissors to bevel the CPVC for smoother/easier loading for the darts.

Sanding the surfaces to be bonded, I used a combination of super glue and hotglue, to connect the barrels to the turret.

A close up reveals where and how close the barrels need to be to connect properly to the plunger tube seal. About half way from the turret to the main shell. Also note how perfectly center the aluminum lines up with plunger tube seal.

Once that was all done, I had to do this...

What would a turreted blaster be without rear loading holes?


...Now, I did say the reason I chose the aluminum was two fold. Here's the other reason.

ARROWS!!!
Since the ChainBlazer is like a little Arrowstorm, I thought, why not? Now my ChainBlazer can fire darts and arrows.

Arrows: 15' to 25' flat. Arrows are just as unpredictable as Streamlines.
Streamlines: 10' to 70' flat. They're Streamlines.
*Slugs (Lowe's FBR with a No. 6 washer and felt tipped): 55' to 60' flat.
Angels' Beige foam (steal BB with hotglue tip): 40' to 45' flat. Beige foam is a little too tight for CPVC.
My Wasp/BumbleBee darts (Buzz Bee yellow foam with rubber heads): 55' to 60' flat.
I found this during one of my thrift store hunts. The orange cover flap was missing and it wasn't priming properly. But what was cool was that it actually had the chain....although I won't be using it.
Upon opening it up, I was able to determine why it wasn't priming properly. The hook for the return spring on the plunger tube catch was broken. Meaning, that since the plunger tube failed to return before the plunger catch released, no air was being directed towards the dart.
An easy fix for this was to Dremel a small hole in the support for the plunger tube catch.
Moving on to the plunger tube itself, I opened up the hole ever so slightly using a Dremel. And using a toothpick, I sealed the gap between the rubber gasket and the plunger tube hole.
-before
-after
The plunger has a skirt style plunger head. I Just put hotglue within the crevice to help push it a little wider creating a better seal.
The stock spring is actually pretty strong for this blaster so I chose not to replace it with something stronger. Therefore I also decided not to do anything to the very interesting catch mechanism.
What I did do, however, was cut a small piece of 1/2 inch PVC to pre-compress the spring a little more.
After putting it back together and testing it out, I moved on to the turret and barrels. Frost Vectron did something very similar WAAAAYYYY back but he used pieces of 1/2 PVC and CPVC.
I chose to use 3/4 inch aluminum with 1/2 inch CPVC nested inside. My reason for this is 2 fold as you'll soon see. The aluminum sheaths have been cut to a length of 4.2 inches. The CPVC were all cut to 4 inches.
The CPVC nests perfectly inside the 3/4 inch aluminum (breech potential). Frost had to shave down the pieces of PVC for the CPVC to nest in porperly. The aluminum tubing made this much easier. I also used a pair of scissors to bevel the CPVC for smoother/easier loading for the darts.
Sanding the surfaces to be bonded, I used a combination of super glue and hotglue, to connect the barrels to the turret.
A close up reveals where and how close the barrels need to be to connect properly to the plunger tube seal. About half way from the turret to the main shell. Also note how perfectly center the aluminum lines up with plunger tube seal.
Once that was all done, I had to do this...
What would a turreted blaster be without rear loading holes?
...Now, I did say the reason I chose the aluminum was two fold. Here's the other reason.
ARROWS!!!
Since the ChainBlazer is like a little Arrowstorm, I thought, why not? Now my ChainBlazer can fire darts and arrows.
Arrows: 15' to 25' flat. Arrows are just as unpredictable as Streamlines.
Streamlines: 10' to 70' flat. They're Streamlines.
*Slugs (Lowe's FBR with a No. 6 washer and felt tipped): 55' to 60' flat.
Angels' Beige foam (steal BB with hotglue tip): 40' to 45' flat. Beige foam is a little too tight for CPVC.
My Wasp/BumbleBee darts (Buzz Bee yellow foam with rubber heads): 55' to 60' flat.
