So, you feel like going pro with the big guns and feel a little strapped for cash? Is the ubiquitous nature of CS guns bothering you? Are you the "Jack" sub-class of soldiers or the "Pseudo-Sniper" medic taking potshots in FFP? Don't worry, the Lanard Shot Gun/Airzone Triple Shot should take you up the ranks as so long as you follow the mod guide thoroughly and have "1337 mod skillz" yo! This guide is here to assist you into creating something into "overhauled-spec" without holding your hand too much. Do pay special attention to minor details along your progress as these blasters have a nature to be temperamental and finicky over the slightest deviation.
And pay no attention to my use of a yellow shell. I'm just that bloody challenged to be different!
This mod aims to:
- increase plunger displacement
- improve plunger seal
- improve turret seal
- utilise ideal barrel setups.
- give you more firepower on the playing field (oh yeah!)
Materials Required
Blaster-barrel prep-up:
- rubber washer - 22mm OD, 10mm ID, 3mm thickness (roughly)
- 40mm Vinidex downpipe endcap
- 40mm PVC downpipe (32mm pressure-rated PVC also works as verified by -Aj-)
- 20mm grey UPVC conduit - medium grade
- 16mm grey UPVC conduit - gooni/KingCam-spec (with an ID of between 13-13.2mm)
- Zap-a-Gap
- Araldite epoxy - 3 day cure (for better results)
Plunger:
- 32mm sink bathplug
- stainless steel washers (TOP SECRET)
- mudguard washers (TOP SECRET)
- nut and bolts - sizes depend on the tapping thread used, ask professional help for assistance
Tools:
- rotary cutting tool/dremel
- assorted files and other woodwork tools
- tapping set - pick a size suitable for your needs (5mm and 8-32 have been used to good effect)
Build time: 5-7 hours (If you can build this faster, then make that a challenge accepted!)
Got your stuff? Right, into the water, head first...
MOD TIME!
Of course, the first thing to do is to open and pull the blaster apart. So yeah...
Turret and Barrels
Start off by pulling the turret out. Don't worry about the housing and the stock barrel nubs; they're not required unless you want to deviate and use the housing as a stabiliser much akin to the U3-spec blasters.
Then we'll go off and start working our way with the dremel, cutting away the excess nubs against the walls. Use a piece of 20mm UPVC to check its fit; it should be made flush-fit.
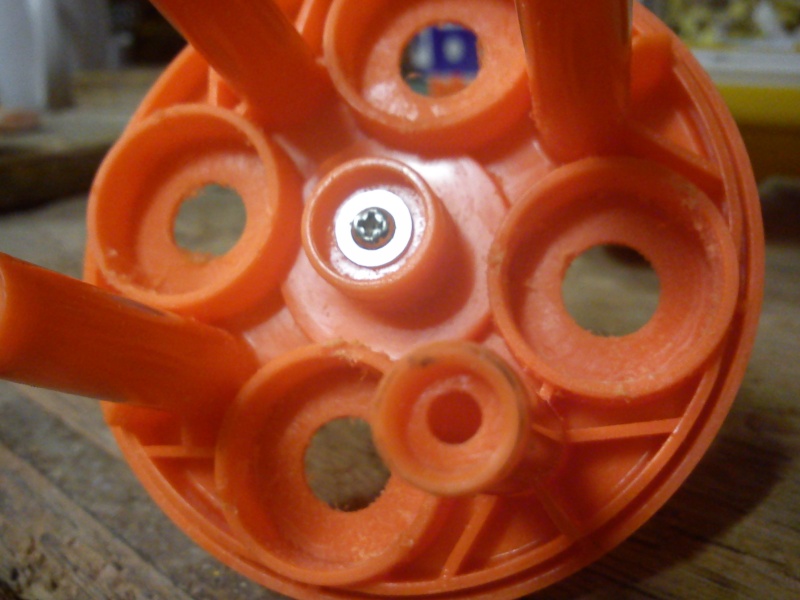
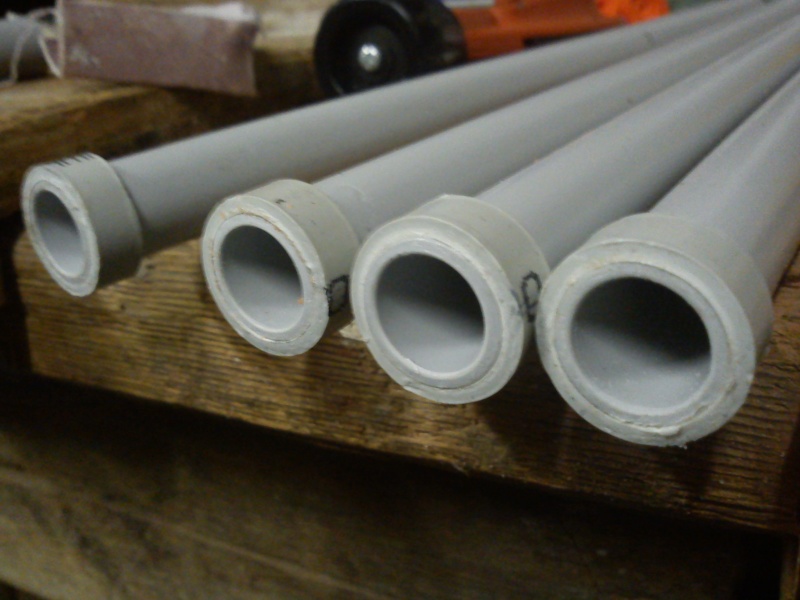
Simply cut desired lengths of the 16mm UPVC (9-10.5" is ideal) and prep-up accordingly (sanding, reaming etc.) Cut small sections of 20mm conduit and Zap-a-Gap them on the back of the barrels. Let them cure for a bit.
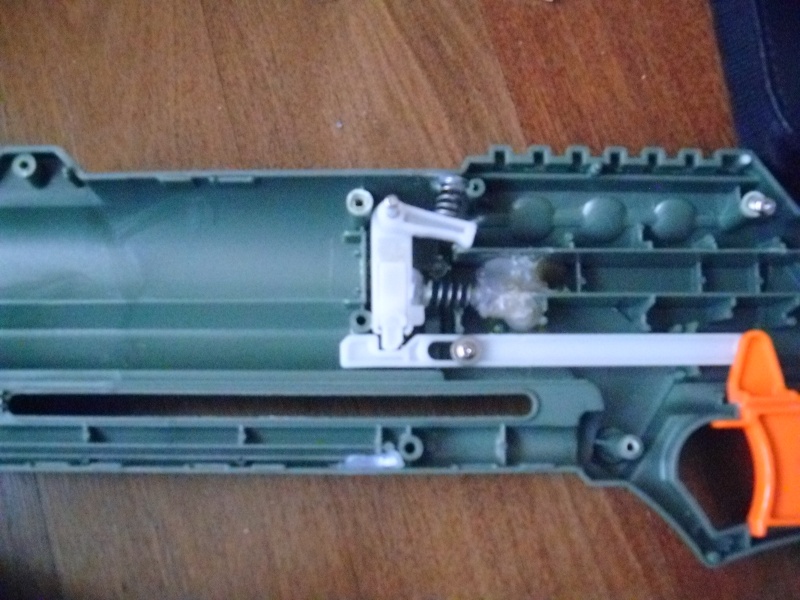
While you're at it, go ahead and do the rotational-mech glue mods. First, pry out the spring and glue the slip clutch. Then, screw back again and apply a small lip of Zap-a-Gap around the rotation cog and the turret.

NOTE: Now's a good time to mark out with a permanent marker the centres for the rearloading holes. Simply line up the turret to rest position and mark where to drill, making note of where the barrels will be at rest.
Once everything is in check, get your araldite ready for gluing. First, enlarge the holes on the turret up until the point where the 16mm conduit barrel ID is visible but not the OD. Then, apply a coat of glue around the 20mm nubs and a little on the base. Install when ready, ensuring to wipe off any excess glue.
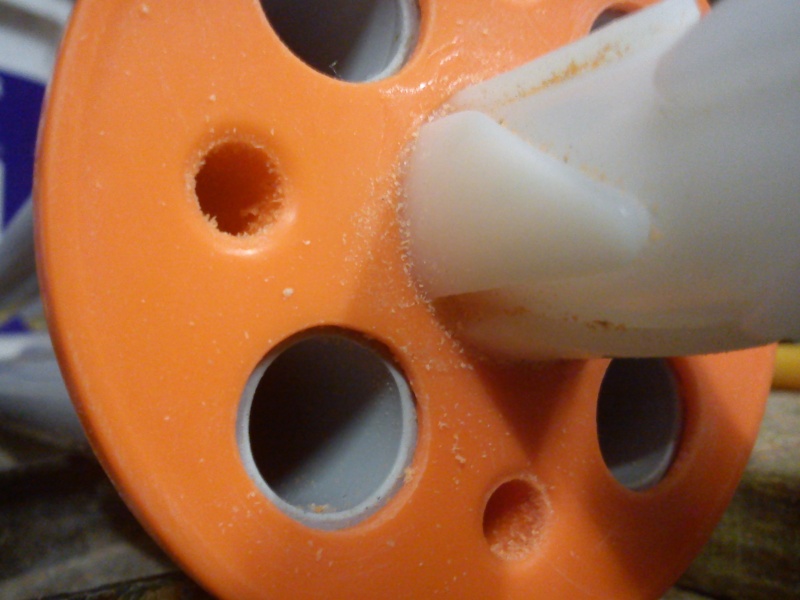
NOTE: If you have a spare barrel spacer around, now's a good time to fit one on to allow the barrels to cure nice and straight.
Plunger (I CANNOT STRESS ENOUGH TO GIVE -Aj- ALL THE CREDIT TO THIS MARVEL)
That said, please refer to this video for additional references. Be prepared for "teh lulz"...
Since this isn't my idea, I'm only going to show a post-production pic of the overall construction. I've omitted the sizes for the washers you'll need as respect to -Aj- (that's right, go figure it out yourselves lol .) It shouldn't be too hard to figure it out from here.

It's just a simple step of drilling through the centre, tapping a thread inside, removing fillings, and installing the components as such.
NOTE: To achieve better results, utilise cutting compound or fluid in conjnuction with your drill bit and tapping set.
Don't forget to dremel out the end notch to allow increased displacement and efficiency.

Plunger Tube Housing
Start off by cutting the 40mm endcap down in size as such. About 15-20mm should do it.
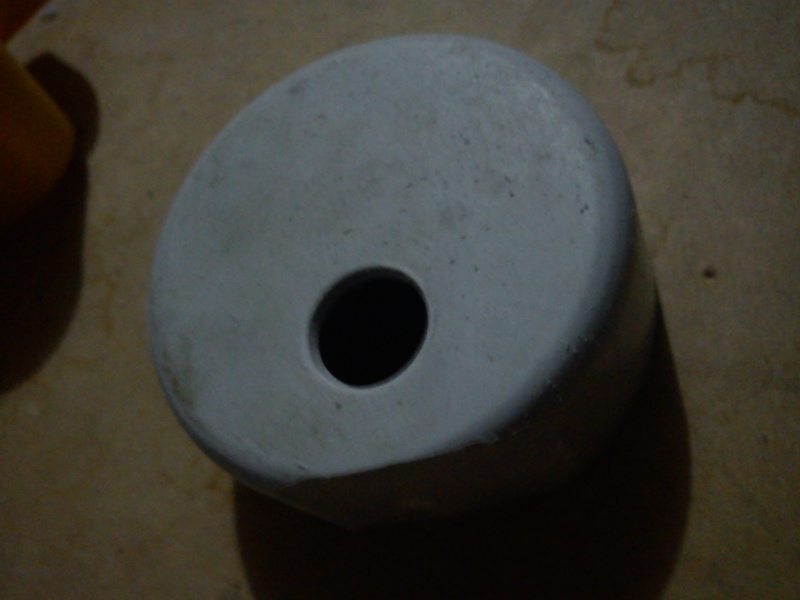
You'll need to do a fair bit of guess-and-checking here.
- Start off by trimming the lip of the endcap that would be sitting over the rotational mechanism; failure to do so will cause improper fitting issues.
- Then glue on the washer to the endcap with Zap-a-Gap. Be sure to line up the centres of both the washer and the turret holes accordingly.
- Drill out the hole in the endcap where the washer is.
- Finally, use a sharp knife to cut away excess rubber off the seal for a better fit.
Endcap:

Finally, cut out about 155mm of the 40mm downpipe for your plunger assembly. The exact measurement is dependent on how well the endcap fits the the turret seal and the shell. Do some guess-and-check work to find the ideal length.
When done, grab some araldite and glue the endcap on the plunger tube in place. PVC cement can also be used if you want.

Guess-and-check fit:

Blaster Shell Preparation
This blaster requires you to dremel away at four key areas for everything to fall in place.
First, the provisions for the stock plunger tube need to be dremeled away along with any other areas the plunger tube endcap will sit.

Next (and this one's a bugger), the notches where the rotational bar rests needs to be trimmed down.

Increase your foregrip stroke by extending the pump grooves.
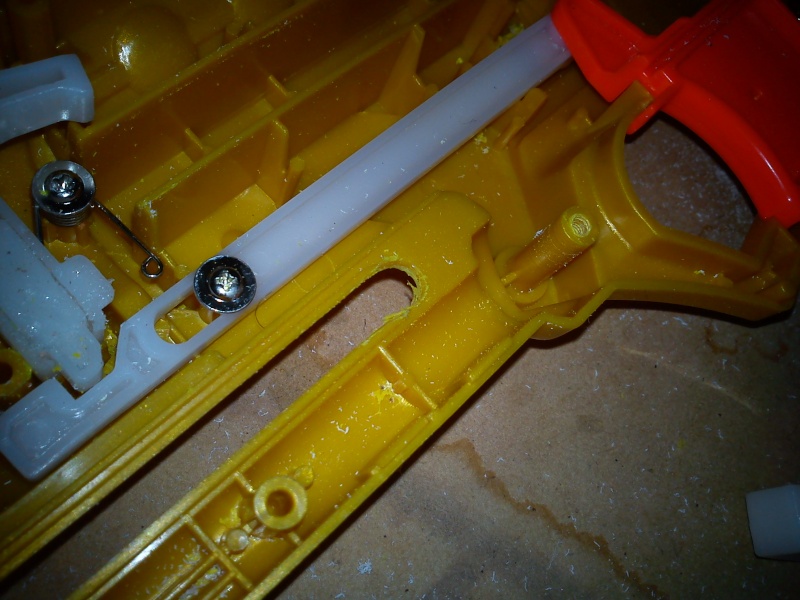
Finally, dremel away those notches on the top of the shell.

Catch
Do the usual catch mods as such. Go here for additional references.
A simple alteration would be to cut a notch in the catch to allow the torsion spring to rest only in that area, reducing slippage. This is assuming you do the BadWrench spring relocation mod.
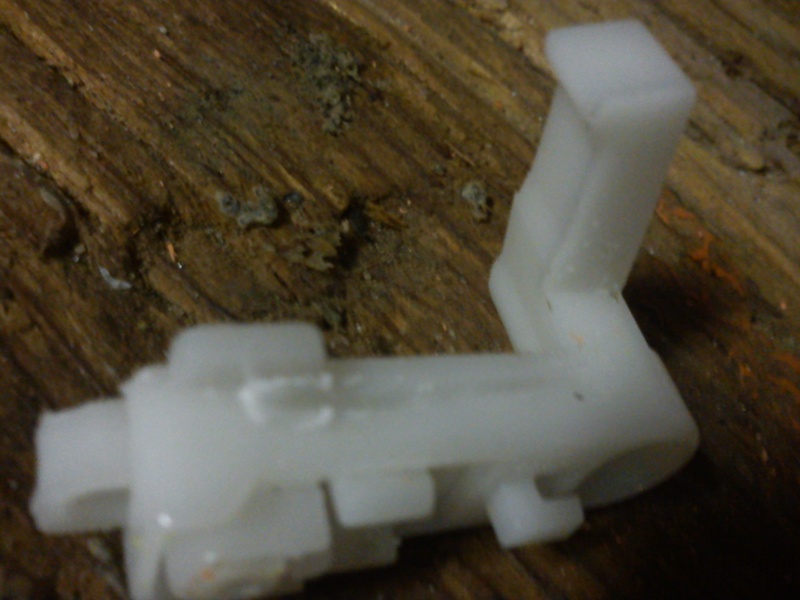
I know, stupid macro on camera is to blame here.
Priming Bar
Refer to this picture as a reference on where to cut and file away for maximising pumpstroke.

Don't be afraid to open up the blaster again and fine-tune any areas requiring additional filing.
Now, check to see if it all fits and works without the spring:
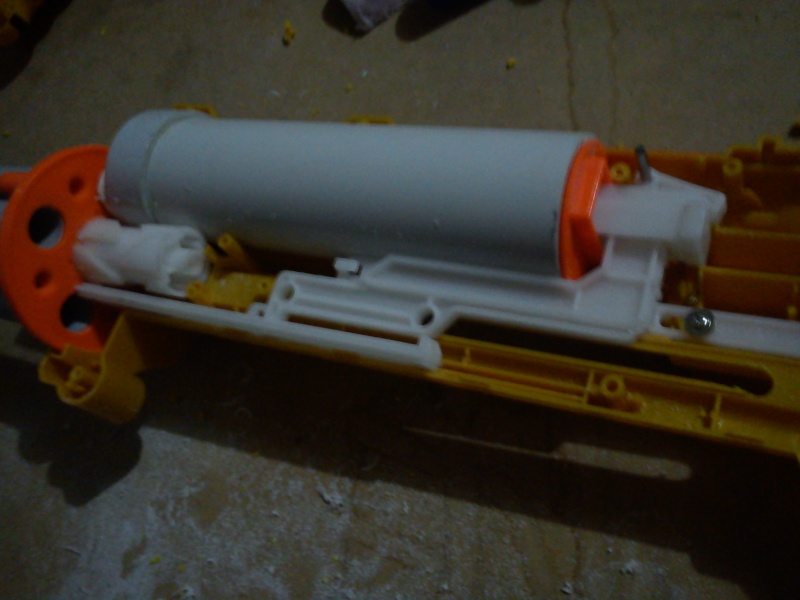

If it's all good, let's push it to the final stretch:
Rearloading Holes
Cut a couple of pieces of 20mm OD UPVC. Fit them in the wells with Zap-a-Gap as shown, making sure to line them up with respect to the turret holes (if you followed earlier advice, this step is easy with good lighting.)
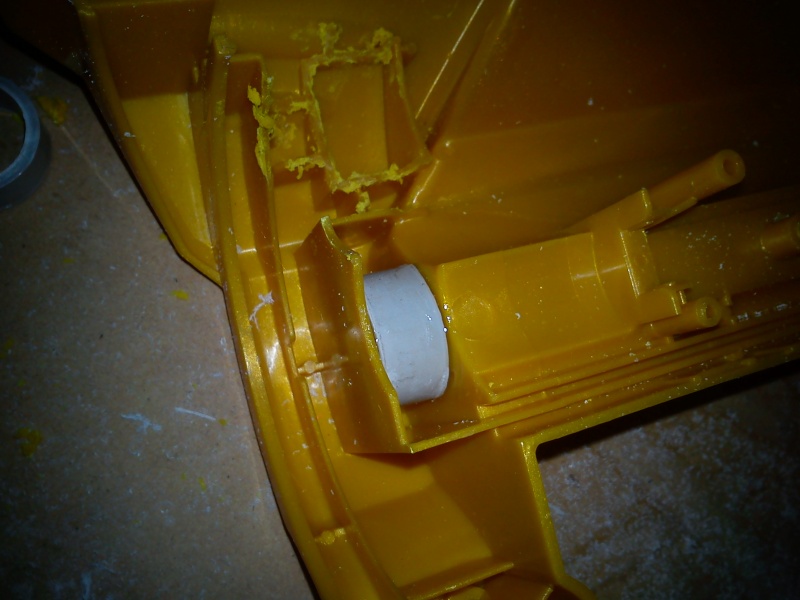
Drill, then dremel away as such. Give it a good sanding around the rim when done.

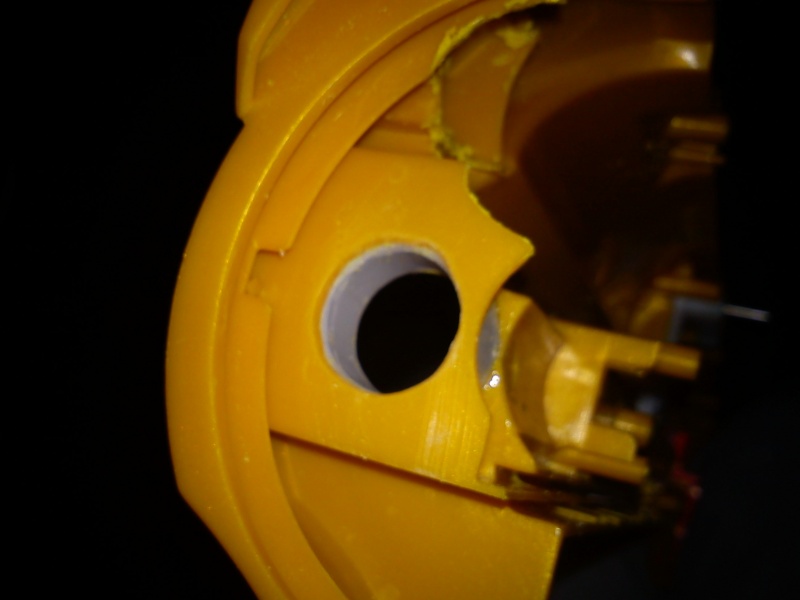
NOTE: Don't be lazy, do both sides to save yourself and others the hassle when reloading. Two slots available to reload is better than one!
Final Steps
Your Shot Gun/Triple Shot should look like this (except for the fact that mine is yellow for awesomeness with 12" barrels for extra dick-waving). If so, install you springs, rinse, clean, lube up with silicone paste, close the shell, and blast away!
Opened:
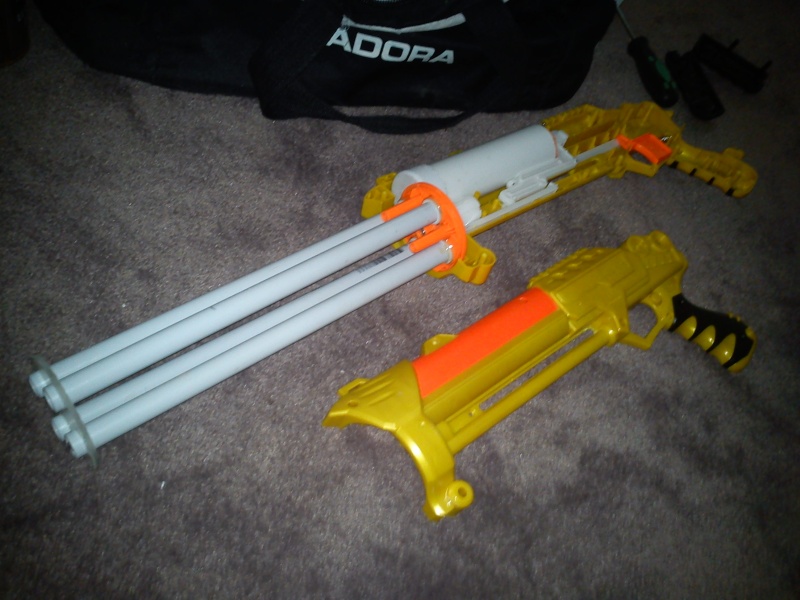
Complete

NOTE: These blasters, as explained earlier, are very finicky down to the minor details. If required, dremel away at the shell even more so if you find that the blaster does not close at all. On that subjuct, you'll find that the blaster will not close completely, and from there it's just a matter of how little of a gap you can achieve before a tightly packed closing of the blaster.
Ranges
It's good as my first carbon fibre model at around the 95' flat mark with a "Chad" spring from 1.6M height. Expect a duel stefan shotgun-load to travel 1/2 to 2/3rds the distance with roughly a 1' spread (results may vary from dart to dart). Minor deficiencies include improper turret seal and plunger seal lubrication which may increase results slightly when rectified.
Final Comments
This thing is a lean and mean beast. However, there are still some minor tweaks in need with regards to the initial backstroke; you may find that the catch doesn't click properly in the final notch. But when this thing kicks in gear, it really kicks in to provide good midfield range nerfing and light mobility. If you get around making your own improvements with the catch issue, post here so I can update the guide accordingly.
If she works well enough to your liking, however, lube her up regularly and watch her shoot and spray all over the place (excuse the bad double entendre).
How's that for my first write-up? Questions and comments welcomed...


