Intro
Released in 2003, the Max Shot was the blaster that was meant to give the Crossbow a run for it's money in performance. Medium-large plunger volume, smooth lever action, and cheap pricetag at the time made this blaster a favourite for a short time before AirTechs and N-Strike came on the scene. Still, if you need something light and mobile to use with a fair punch and you happen to have one, look no further.
This mod aims to:
Materials Required
Blaster-plunger tube prep-up:
Plunger:
Tools:
Build time: 5 hours (excluding drying times)
Let's give this classic a good remake!
MOD TIME!
If you haven't already done so, refer to this link on how to disable the locks and fix the trigger safety measures: cxwq's Original Mod
Plunger Head
Let's remove the stock plunger head by hammering out the pin (use an object suitable to strike the pin).

Now the rod is exposed.

Start prepping out your drill bit and tapping set. Drill down the middle to the very end cavity, then tap the thread.
Front:

Side:

Rear:

Then sand out the ridges to allow smaller springs to be installed.

The plunger head components will be installed in the following layout.


The bathplug head will stick with a skirt-style seal for a change.


Let's test it. If you're satified, whack your spring combos in and start getting to the next step.
Plunger Tube Fabrication - Coupler System
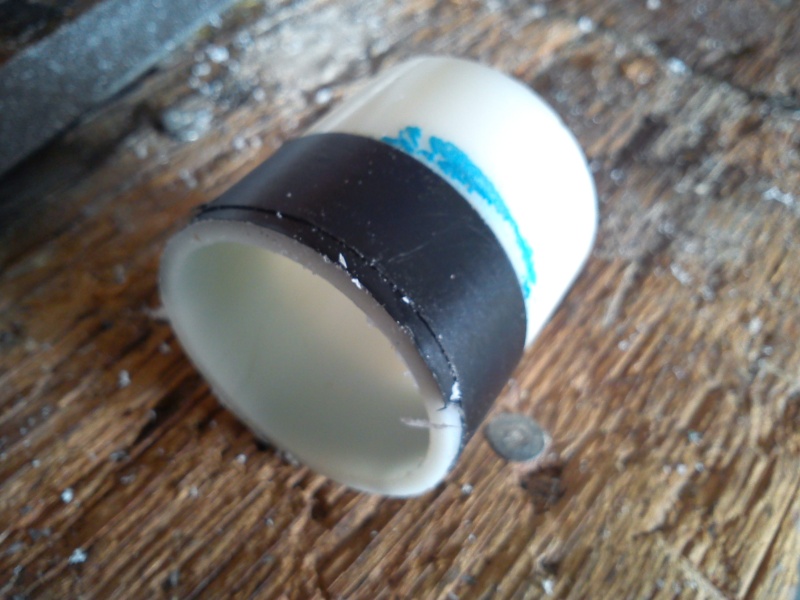
Cut a 50mm piece out of your stock plunger tube. Wrap enough e-tape until it can be snuggly fitted inside the 32mm PVC tube.

NOTE: This part does NOT get glued in the plunger tube.
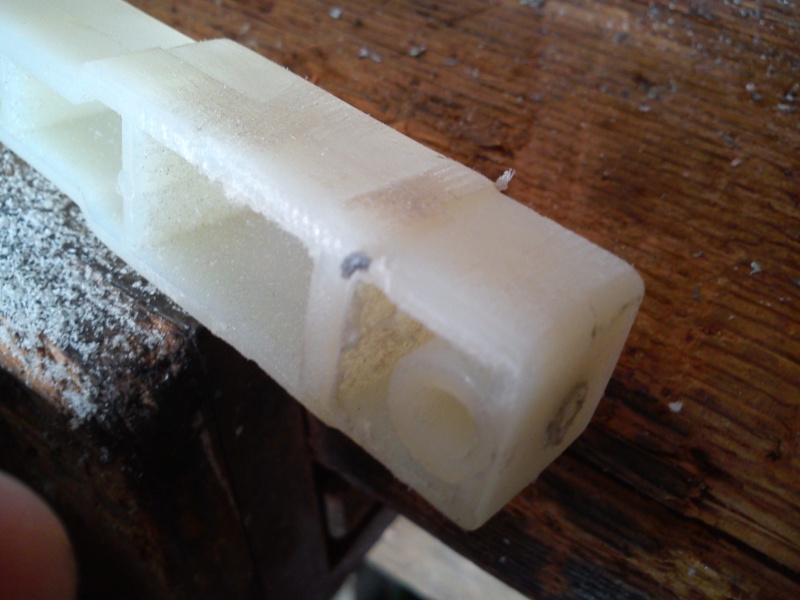
NOTE: While this write-up does not contain any methods in a spring rest, it's advised you install a spring rest using a 25mm UPVC reducer or equivalent sized and nest it inside the stock plunger tube spacer to prevent the blue plunger tube rest from disintegrating.
Now, lets cut the desired plunger tube length at 150mm. Smoothen to your liking.
The coupler setup used is comprised of the following parts:
As displayed:

So, first thing's first is to solvent weld the 16mm reducer inside the 20mm UPVC coupler.

NOTE: While this write-up does not contain any methods in a dart stop, you may want to add a pin on the inside of the 16mm reducer to prevent darts getting vacuumed in the plunger tube.
Then solvent weld the 20mm coupler inside the 25mm UPVC reducer.

Then solvent weld the stock plunger tube spacer over the 25mm UPVC reducer.

Finally, epoxy the whole coupler setup in the upsized plunger tube.

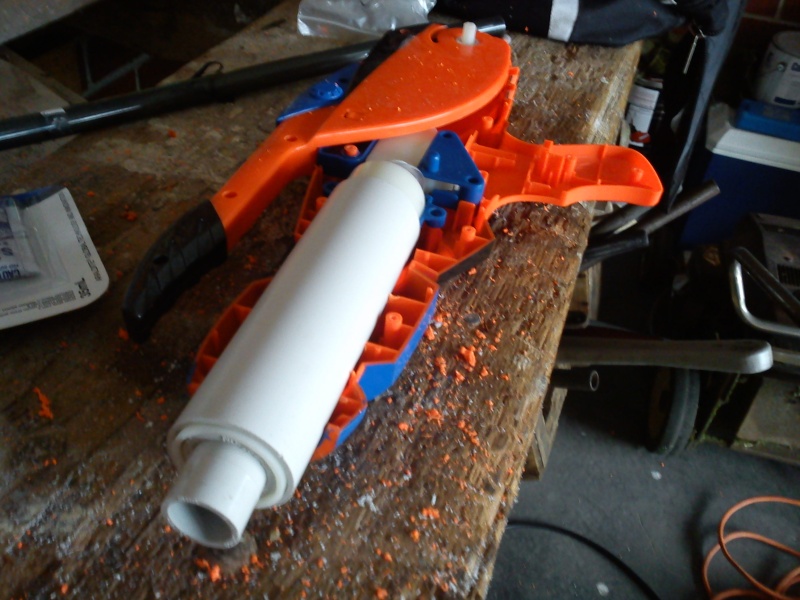
And you should then get something similar to this picture (albeit glued in place with the proper 32mm pressure-PVC piping)

Now, grab that dremel ready with your earplugs for this noisy step.
Shell Preparation
There are two major areas of interest in which the shell needs to be hacked away. The methods are applied to both sides of the blaster.
First, dremel away as required at the plunger tube provisions up to the point where your upsized plunger tube can fit inside.


Then, the front of the shell needs to be smoothened out to allow your plunger tube spacer to comfortably fix and stabilise in the blaster. Also, mark out where to dremel away the front closing of the shell by marking off using the 32mm pressure-PVC as a guide before hacking away. Double-check by closing the shell through guess-and-check methods.

Once completed, we have one more step to go. Homestretch in sight...
Stability and Final Assembly
Not much info is needed. Simply cut your 32mm pressure-PVC coupler for some stabilising rings.
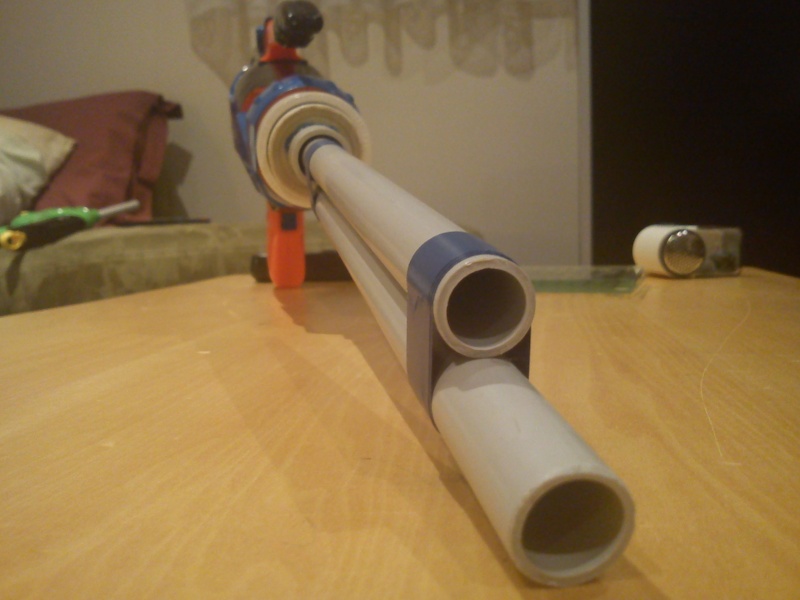
Install the tube, then mark out where the rings should go. It's important that you ensure a nice snug spacing of the rings so that the tube does not move while firing. Like such:

Glue them in place. Zap-a-Gap is ideal for the smaller one while the larger one can either utilise a solvent weld or glueing process.
Final check:

Once satisfied, lube accordingly, close the blaster up, and start utilising your barrel setups. Fire away!
My favourite: Speedloader setup


Ranges
With an SS spring installed, a cold day with a 3-dart incline clip was hitting the 85-95' flat range using streamline-length stefans with size 00 splitshots. More results are to come in the future as kinks are rectified...
I've noticed that my Max Shot blew apart in the blue plunger tube rest, preventing the spring to achieve full compression. Range updates will come in the future. I'm hoping for 110+' flat with the SS spring.
Final Comments
It vacuum-loads so bonus points there. Unless you're silly like me and forgot to put a dart stop...
This blaster now provides a lightweight punch on the field with smooth priming plus extra street-cred for having such a classic in your arsenal. You've now got a large volume blaster with a nice modular setup that can accept anything you want compatible with the UPVC fittings. It may have some deficiencies of range potential as opposed to the Hand Cannon, but the Max Shot does boast much better handling properties. Go ahead and dickwave for all anyone cares if you complete this mod; you deserve the right to do so.
However, I must stress that I may do more improvements and revisions for this blaster as I find there are some kinks that need to be resolved.
Released in 2003, the Max Shot was the blaster that was meant to give the Crossbow a run for it's money in performance. Medium-large plunger volume, smooth lever action, and cheap pricetag at the time made this blaster a favourite for a short time before AirTechs and N-Strike came on the scene. Still, if you need something light and mobile to use with a fair punch and you happen to have one, look no further.
This mod aims to:
- increase plunger displacement
- improve plunger seal
- install a modular coupler setup with compatibility with UPVC accesories
- allow the use of smaller OD springs
Materials Required
Blaster-plunger tube prep-up:
- 32mm Holman-branded pressure-PVC pipe
- 32mm pressure-PVC coupler
- 16mm UPVC reducer
- 20mm UPVC coupler
- 25mm UPVC reducer
- PVC Cement + primer
- E-tape
- Zap-a-Gap
- Araldite epoxy - 3 day cure (for better results)
Plunger:
- 32mm bathplug
- mudguard washer
- stainless steel washers
- nut and bolts - sizes depend on the tapping thread used, ask professional help for assistance
Tools:
- rotary cutting tool/dremel
- assorted files and other woodwork tools
- tapping set - pick a size suitable for your needs (8-32 was used in this write-up)
Build time: 5 hours (excluding drying times)
Let's give this classic a good remake!
MOD TIME!
If you haven't already done so, refer to this link on how to disable the locks and fix the trigger safety measures: cxwq's Original Mod
Plunger Head
Let's remove the stock plunger head by hammering out the pin (use an object suitable to strike the pin).

Now the rod is exposed.

Start prepping out your drill bit and tapping set. Drill down the middle to the very end cavity, then tap the thread.
Front:

Side:

Rear:

Then sand out the ridges to allow smaller springs to be installed.

The plunger head components will be installed in the following layout.


The bathplug head will stick with a skirt-style seal for a change.


Let's test it. If you're satified, whack your spring combos in and start getting to the next step.
Plunger Tube Fabrication - Coupler System
Cut a 50mm piece out of your stock plunger tube. Wrap enough e-tape until it can be snuggly fitted inside the 32mm PVC tube.

NOTE: This part does NOT get glued in the plunger tube.
NOTE: While this write-up does not contain any methods in a spring rest, it's advised you install a spring rest using a 25mm UPVC reducer or equivalent sized and nest it inside the stock plunger tube spacer to prevent the blue plunger tube rest from disintegrating.
Now, lets cut the desired plunger tube length at 150mm. Smoothen to your liking.
The coupler setup used is comprised of the following parts:
- 16mm UPVC reducer
- 20mm UPVC coupler
- 25mm UPVC reducer
- stock plunger tube spacer with e-tape fitting
As displayed:

So, first thing's first is to solvent weld the 16mm reducer inside the 20mm UPVC coupler.

NOTE: While this write-up does not contain any methods in a dart stop, you may want to add a pin on the inside of the 16mm reducer to prevent darts getting vacuumed in the plunger tube.
Then solvent weld the 20mm coupler inside the 25mm UPVC reducer.

Then solvent weld the stock plunger tube spacer over the 25mm UPVC reducer.

Finally, epoxy the whole coupler setup in the upsized plunger tube.

And you should then get something similar to this picture (albeit glued in place with the proper 32mm pressure-PVC piping)

Now, grab that dremel ready with your earplugs for this noisy step.
Shell Preparation
There are two major areas of interest in which the shell needs to be hacked away. The methods are applied to both sides of the blaster.
First, dremel away as required at the plunger tube provisions up to the point where your upsized plunger tube can fit inside.


Then, the front of the shell needs to be smoothened out to allow your plunger tube spacer to comfortably fix and stabilise in the blaster. Also, mark out where to dremel away the front closing of the shell by marking off using the 32mm pressure-PVC as a guide before hacking away. Double-check by closing the shell through guess-and-check methods.

Once completed, we have one more step to go. Homestretch in sight...
Stability and Final Assembly
Not much info is needed. Simply cut your 32mm pressure-PVC coupler for some stabilising rings.
Install the tube, then mark out where the rings should go. It's important that you ensure a nice snug spacing of the rings so that the tube does not move while firing. Like such:

Glue them in place. Zap-a-Gap is ideal for the smaller one while the larger one can either utilise a solvent weld or glueing process.
Final check:

Once satisfied, lube accordingly, close the blaster up, and start utilising your barrel setups. Fire away!
My favourite: Speedloader setup


Ranges
With an SS spring installed, a cold day with a 3-dart incline clip was hitting the 85-95' flat range using streamline-length stefans with size 00 splitshots. More results are to come in the future as kinks are rectified...
I've noticed that my Max Shot blew apart in the blue plunger tube rest, preventing the spring to achieve full compression. Range updates will come in the future. I'm hoping for 110+' flat with the SS spring.
Final Comments
It vacuum-loads so bonus points there. Unless you're silly like me and forgot to put a dart stop...
This blaster now provides a lightweight punch on the field with smooth priming plus extra street-cred for having such a classic in your arsenal. You've now got a large volume blaster with a nice modular setup that can accept anything you want compatible with the UPVC fittings. It may have some deficiencies of range potential as opposed to the Hand Cannon, but the Max Shot does boast much better handling properties. Go ahead and dickwave for all anyone cares if you complete this mod; you deserve the right to do so.
However, I must stress that I may do more improvements and revisions for this blaster as I find there are some kinks that need to be resolved.


