Hi guys,
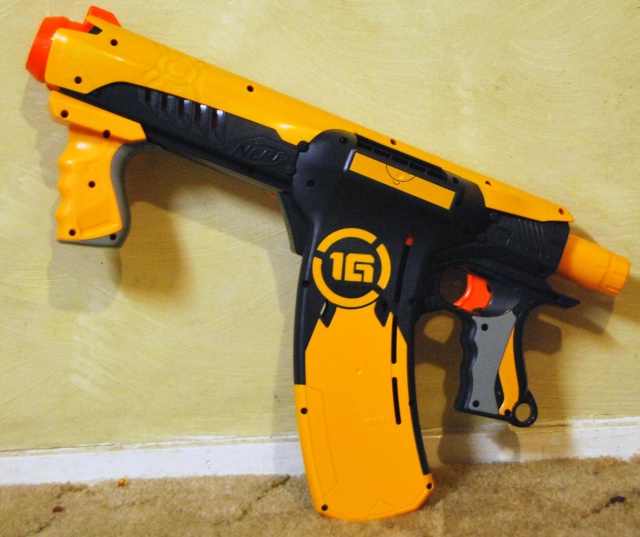
Decided to take the plunge and modify my new Q16. I'd like to point out, this blaster is an absolute b$#^h to open and close, so attempt this at your own peril...

First off, open the blaster - easier said than done. There's three layer's to the blaster, with screws hidden in all sorts of places. First, remove the yellow flashing. Then remove the pump handle. After that, remove one half of the internal magazine. There's 3 screws underneath this. Remove them, and the rest of the screws.
There's an orange piece that joins on to one part of the magazine feeder, which has a little black collared screw. Remove this screw, and set aside. Next, you'll notice an orange triple notched flat piece of plastic, that is the other half of the dart feeder. It has to be jimmied up with a flat screwdriver, while you pull the main blue shell half apart.
Here's a look at the internals:

It's a fairly simple reverse-plunger system, so mod's are limited.
That's really about it. Obviously, a spring change is possible, but I didn't have any springs remotely close. The plunger tube is slightly larger than that of the Recon, AT etc
I know it's not an in-depth tutorial, but the blaster isn't really worth modding IMHO. It's a fairly simple process regardless, and most people should be able to get it sorted fairly easily.
With the above mods, I managed to pick up around 10 feet extra range from stock.
Parallel: 44 feet
Angled: 56 feet
Nothing exciting really, but it is a nice-feeling blaster. Closing it up is an issue, but Psyk has a video tutorial on how to do that, so I'll leave it with him.
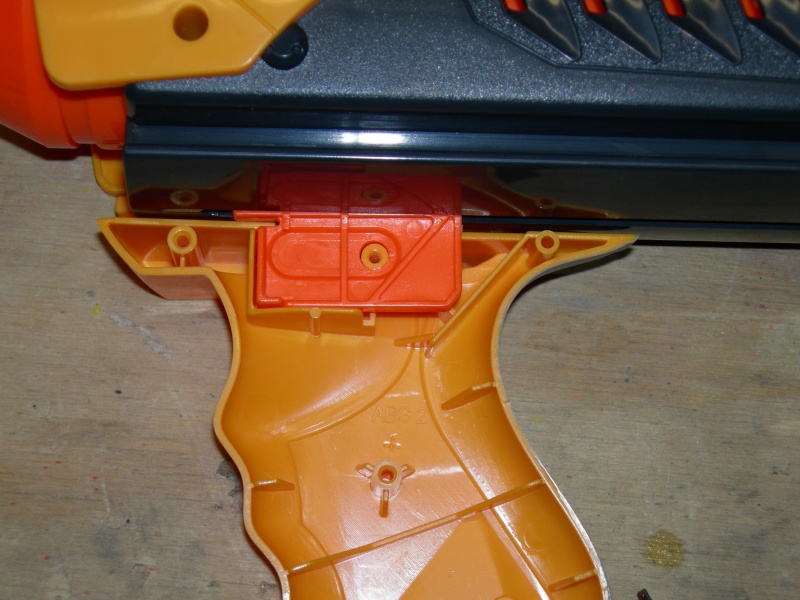
The only other thing worth mentioning, is the improved handle connector over the Raider/AT:

Decided to take the plunge and modify my new Q16. I'd like to point out, this blaster is an absolute b$#^h to open and close, so attempt this at your own peril...

First off, open the blaster - easier said than done. There's three layer's to the blaster, with screws hidden in all sorts of places. First, remove the yellow flashing. Then remove the pump handle. After that, remove one half of the internal magazine. There's 3 screws underneath this. Remove them, and the rest of the screws.
There's an orange piece that joins on to one part of the magazine feeder, which has a little black collared screw. Remove this screw, and set aside. Next, you'll notice an orange triple notched flat piece of plastic, that is the other half of the dart feeder. It has to be jimmied up with a flat screwdriver, while you pull the main blue shell half apart.
Here's a look at the internals:

It's a fairly simple reverse-plunger system, so mod's are limited.
- Drill out the AR in the barrel.
- Add some plumber's tape underneath the o-ring and your preferred lubricant.
- Glue up the 2 air release holes in the barrel.
- I also added half a width of e-tape to the plunger tube, to add a little more spring compression.
- Reinforce the rear of the plunger tube with washer and epoxy etc.
That's really about it. Obviously, a spring change is possible, but I didn't have any springs remotely close. The plunger tube is slightly larger than that of the Recon, AT etc
I know it's not an in-depth tutorial, but the blaster isn't really worth modding IMHO. It's a fairly simple process regardless, and most people should be able to get it sorted fairly easily.
With the above mods, I managed to pick up around 10 feet extra range from stock.
Parallel: 44 feet
Angled: 56 feet
Nothing exciting really, but it is a nice-feeling blaster. Closing it up is an issue, but Psyk has a video tutorial on how to do that, so I'll leave it with him.
The only other thing worth mentioning, is the improved handle connector over the Raider/AT:

Last edited by clunk07 on Sun May 29, 2011 4:28 pm; edited 1 time in total


