Right, so, the Nerf Reflex IX-1 dart gun was originally sold in a two-pack as a Nerf Tag set, but after having picked one up at Coles for less than $10 ($5.60 actually, during a sale), I figured I might as well screw around with it. Basically, I've discovered two modifications for this gun. One is a simple Air Restrictor removal, which is a bit more complicated than just sticking a drill into the gun and drilling it out. The other involves unhinging a spring and taping up the back of the gun which'll allow the loader to remain back and not spring forward. I'll explain the benefits later. Both of these will be in picture form.
Well, here's how to remove the Air Restrictor on the Nerf Reflex!
Basically, what you want first is a Phillips head screwdriver, as we'll be using that to undo the gun's chassis, and possibly a hammer for the AR removal.
Part One: AR Removal

Here's the gun. Cute, innit?

Here's the gun's loader. This is the part you pull back to load, much like the Maverick in it's mechanism. You'll want to undo the three screws that are in this part, first. Store them however you wish (Losing them isn't suggested.)

Here's the gun with the loader removed for now. There are another 3 screws underneath the loader, and another 4 on the main body of the gun. Remove these and store as you wish. You'll need all of them later, mind you.

Here are the internals of the gun. Nothing too special, really. Now comes the fun part!

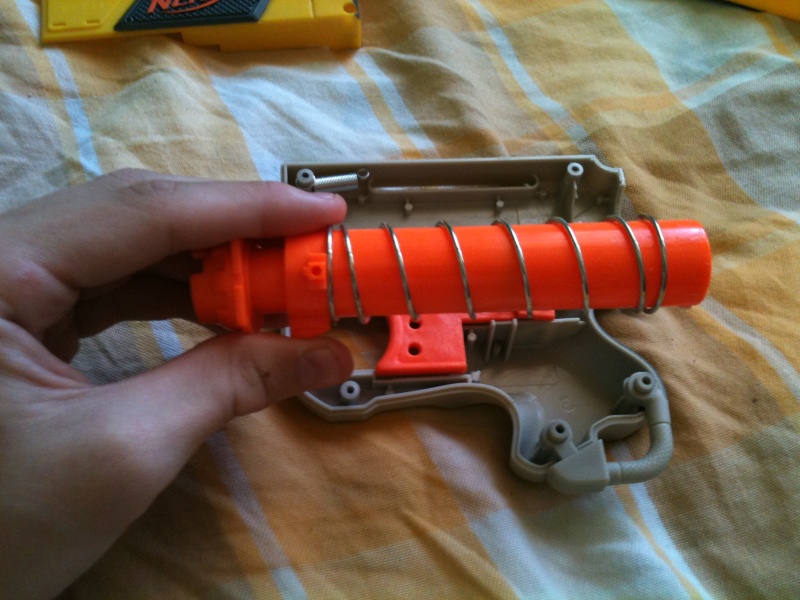
Remove the main barrel part thingy (Yeah, not so good with the mechanical lingo just now.) as I have done in the image.

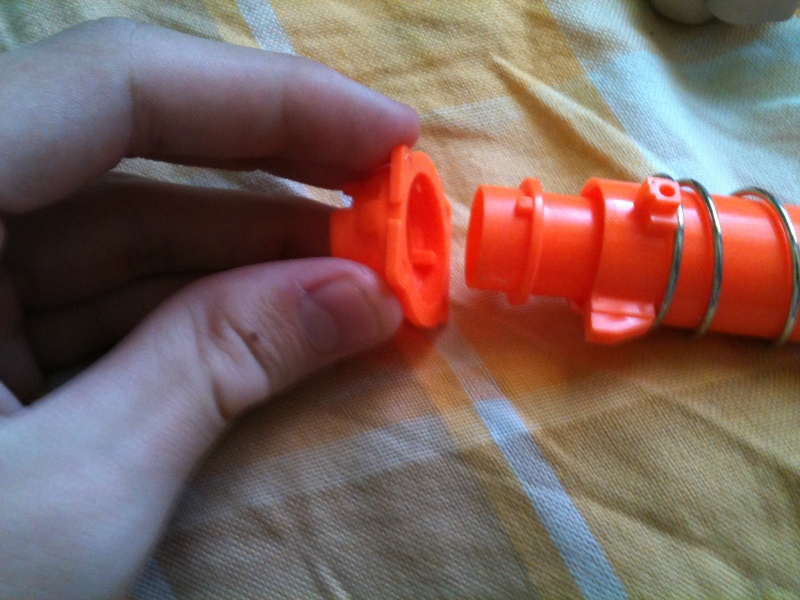
Now, remove the front part from the barrel.

Now, remove the smaller orange tube from the main barrel part. This is what has the AR in it.

Here is the inside of it post-AR removal. Instead of a hollow space, you'll see your average Air Restrictor. Nothing too special.

Now, you'll want to either stab or screw the AR out. I chose stabbing it out by putting my screwdriver through the back hole. Stand the tube up so that the hole displayed here is facing up. Grab a screwdriver or anything of the sorts which can fit, then beat it with a hammer-like object a few times. The AR should break and fall out. Simple. Now, since this is done, rebuild the gun like it was before (Reverse the steps if you must) until it looks exactly like the gun you opened a short while ago.

Now, you'll notice that in this picture that there is a spring holder. Make sure the spring is behind this, or else your gun will more than likely screw up. I speak from experience here.

Here is the insides of the gun for another reference when rebuilding it.

Now, reattach the chassis, redo all the screws/etc. Don't put the loader on just yet.

Here's the back part of the loader: Notice how the loader spring is no longer attached? We want that. Don't try to alter that, or else bad things will happen. Okay, now that I've warned you, you can now put the front part of the loader back on. Time to use your trusty Phillips head again!
Part Two: Tape Solves Everything

What you'll need for this step is your Reflex with AR removal, and some electric tape (Any colour you want, really) and possibly some scissors.
Attach the tape to the loader thusly:


Make sure the tape doesn't overlap the small ridge at the bottom of the loader. Cut it off at an appropriate length.
And now, here's your finished product, primed and ready to fire:

Test Video
I took the liberty of filming a small video of how it works with the AR removal. Before you watch, however, note that with the loader sliding forward along with the firing mechanism, there is quite a bit of recoil on the gun, so it will effectively shoot on an angle when firing flat. Aiming down is always a best idea during target practice. In this video, I will be using Whistler Darts, which funnily enough don't whistle!
After-notes, and my opinion:
I found that this gun shoots pretty far post-modification, and with the added recoil from the second part of the mod, feels a lot more authentic and "real", really. It may not be necessary, but I certainly thought it to be an improvement. I may consider replacing the spring for a bit more power, but that can wait.
Anyway, there's my first write-up done. Please don't stab me. D:
Well, here's how to remove the Air Restrictor on the Nerf Reflex!
Basically, what you want first is a Phillips head screwdriver, as we'll be using that to undo the gun's chassis, and possibly a hammer for the AR removal.
Part One: AR Removal

Here's the gun. Cute, innit?

Here's the gun's loader. This is the part you pull back to load, much like the Maverick in it's mechanism. You'll want to undo the three screws that are in this part, first. Store them however you wish (Losing them isn't suggested.)

Here's the gun with the loader removed for now. There are another 3 screws underneath the loader, and another 4 on the main body of the gun. Remove these and store as you wish. You'll need all of them later, mind you.

Here are the internals of the gun. Nothing too special, really. Now comes the fun part!

Remove the main barrel part thingy (Yeah, not so good with the mechanical lingo just now.) as I have done in the image.

Now, remove the front part from the barrel.

Now, remove the smaller orange tube from the main barrel part. This is what has the AR in it.

Here is the inside of it post-AR removal. Instead of a hollow space, you'll see your average Air Restrictor. Nothing too special.

Now, you'll want to either stab or screw the AR out. I chose stabbing it out by putting my screwdriver through the back hole. Stand the tube up so that the hole displayed here is facing up. Grab a screwdriver or anything of the sorts which can fit, then beat it with a hammer-like object a few times. The AR should break and fall out. Simple. Now, since this is done, rebuild the gun like it was before (Reverse the steps if you must) until it looks exactly like the gun you opened a short while ago.

Now, you'll notice that in this picture that there is a spring holder. Make sure the spring is behind this, or else your gun will more than likely screw up. I speak from experience here.

Here is the insides of the gun for another reference when rebuilding it.

Now, reattach the chassis, redo all the screws/etc. Don't put the loader on just yet.

Here's the back part of the loader: Notice how the loader spring is no longer attached? We want that. Don't try to alter that, or else bad things will happen. Okay, now that I've warned you, you can now put the front part of the loader back on. Time to use your trusty Phillips head again!
Part Two: Tape Solves Everything

What you'll need for this step is your Reflex with AR removal, and some electric tape (Any colour you want, really) and possibly some scissors.
Attach the tape to the loader thusly:


Make sure the tape doesn't overlap the small ridge at the bottom of the loader. Cut it off at an appropriate length.
And now, here's your finished product, primed and ready to fire:

Test Video
I took the liberty of filming a small video of how it works with the AR removal. Before you watch, however, note that with the loader sliding forward along with the firing mechanism, there is quite a bit of recoil on the gun, so it will effectively shoot on an angle when firing flat. Aiming down is always a best idea during target practice. In this video, I will be using Whistler Darts, which funnily enough don't whistle!
After-notes, and my opinion:
I found that this gun shoots pretty far post-modification, and with the added recoil from the second part of the mod, feels a lot more authentic and "real", really. It may not be necessary, but I certainly thought it to be an improvement. I may consider replacing the spring for a bit more power, but that can wait.
Anyway, there's my first write-up done. Please don't stab me. D:


