Hi guys,
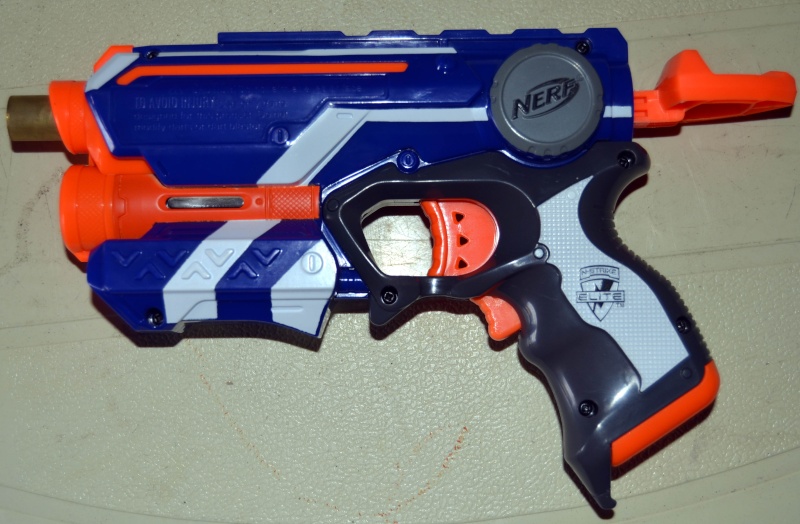
Had a Firestrike arrive from Amazon the other week. It's a nice pistol, obviously very similar to the NF, except for the handle being signifcantly smaller. Apart from this, I'm rather impressed with it. A little more difficult to mod as compared to a NF, but I believe it has more potential.
Mod's covered -
* AR removal
* Spring upgrade
* Catch spring upgrade
* Barrel replacement
Tools:
•Basic tool kit
•Rotary tool
Materials:
•Black Tactical DTG spring or similar
•Silicone Grease
•Replacement springs
•Teflon tape
•Section of 17/32" brass tubing
As always, start by opening up your blaster. This is what you should see:
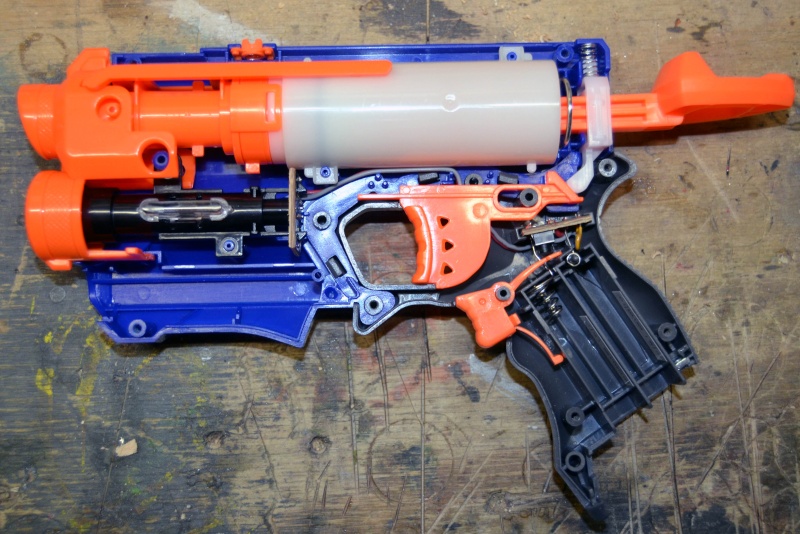
Remove the plunger assembly, barrel tip and slide the laser pointer out of the way.
Next remove the plunger rod, and this is what you have...

The plunger head - note the piece of rubber that acts as a buffer pad... nice work Hasbro!!
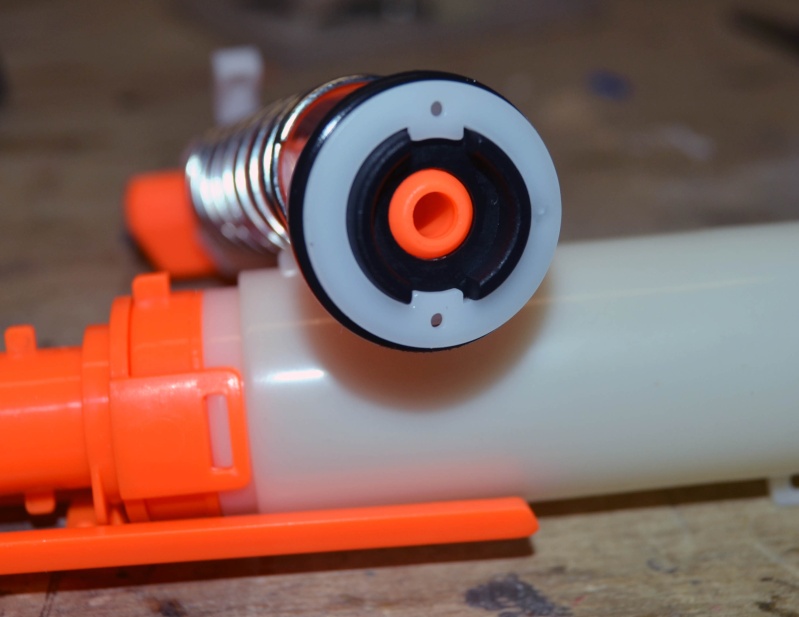
Seeing as I only have 1 of these, I didn't want to mess around too much by trying to remove the plunger head from the rod. Solution - just wind your upgrade spring directly on to the rod. Not the easiest task, but less mucking around than cutting and re-gluing the head. Here I've used a Black Tactical DTG spring, which nests quite well inside the stock spring. The catch spring is quite weak, so I just replaced it with a beefier spring from my grab kit.

You'll want to remove the head of the plunger tube, which is extremely simple to do. Once it's off, the AR should fall out, leaving you with these pieces.
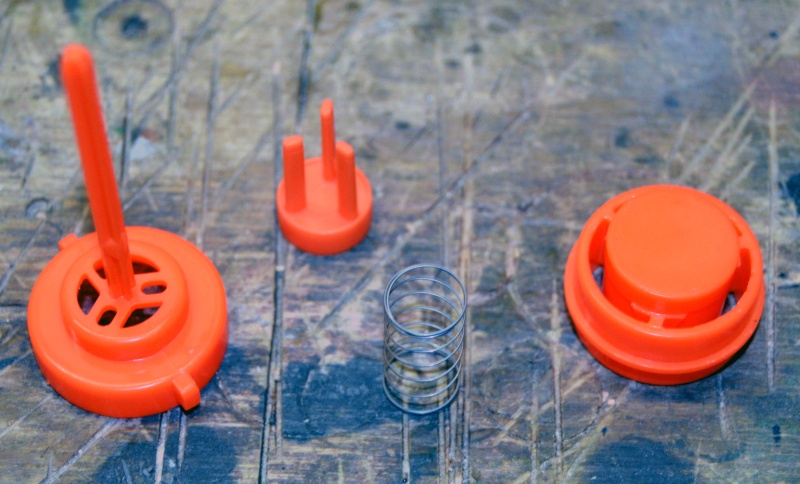
Cut the dart peg off, and cut the centre out of the large round piece, by slicing through the tri-wing connector pieces. Put this piece back underneath the dart post holder (image on far left). All the other pieces on the right can be trashed.
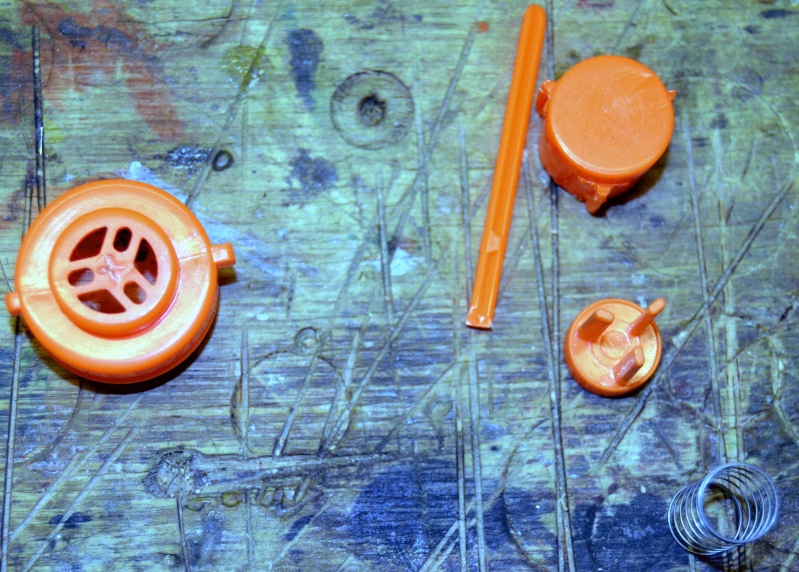
Cut a piece of your brass around 7cm long. Ream the stock barrel out using a drill bit (13mm) until the brass is a snug fit. If done properly, you won't need to glue it in either.
All that's left to do is put a little bit of teflon tape under the o-ring, and re-lube (the plunger tube appears to be tapered, and contact is only made by the PH for the last 3 cm's approx.
Re-assemble the blaster, and you should be good to go. The plunger rod did scuff up a little when I wound the spring on, so once it was assembled, I primed the blaster, and gave the rod a light buff with some fine grit sandpaper to ensure it slides smoothly through the catch plate.
Using heavy stinger darts (1.16 grams) I managed to get flat ranges between 85 and 90 feet.
When I find a little more time, I'll put up exact ranges, and test the Elite darts as well.
Cheers,
Had a Firestrike arrive from Amazon the other week. It's a nice pistol, obviously very similar to the NF, except for the handle being signifcantly smaller. Apart from this, I'm rather impressed with it. A little more difficult to mod as compared to a NF, but I believe it has more potential.
Mod's covered -
* AR removal
* Spring upgrade
* Catch spring upgrade
* Barrel replacement
Tools:
•Basic tool kit
•Rotary tool
Materials:
•Black Tactical DTG spring or similar
•Silicone Grease
•Replacement springs
•Teflon tape
•Section of 17/32" brass tubing
As always, start by opening up your blaster. This is what you should see:

Remove the plunger assembly, barrel tip and slide the laser pointer out of the way.
Next remove the plunger rod, and this is what you have...

The plunger head - note the piece of rubber that acts as a buffer pad... nice work Hasbro!!

Seeing as I only have 1 of these, I didn't want to mess around too much by trying to remove the plunger head from the rod. Solution - just wind your upgrade spring directly on to the rod. Not the easiest task, but less mucking around than cutting and re-gluing the head. Here I've used a Black Tactical DTG spring, which nests quite well inside the stock spring. The catch spring is quite weak, so I just replaced it with a beefier spring from my grab kit.

You'll want to remove the head of the plunger tube, which is extremely simple to do. Once it's off, the AR should fall out, leaving you with these pieces.

Cut the dart peg off, and cut the centre out of the large round piece, by slicing through the tri-wing connector pieces. Put this piece back underneath the dart post holder (image on far left). All the other pieces on the right can be trashed.

Cut a piece of your brass around 7cm long. Ream the stock barrel out using a drill bit (13mm) until the brass is a snug fit. If done properly, you won't need to glue it in either.

All that's left to do is put a little bit of teflon tape under the o-ring, and re-lube (the plunger tube appears to be tapered, and contact is only made by the PH for the last 3 cm's approx.
Re-assemble the blaster, and you should be good to go. The plunger rod did scuff up a little when I wound the spring on, so once it was assembled, I primed the blaster, and gave the rod a light buff with some fine grit sandpaper to ensure it slides smoothly through the catch plate.
Using heavy stinger darts (1.16 grams) I managed to get flat ranges between 85 and 90 feet.
When I find a little more time, I'll put up exact ranges, and test the Elite darts as well.
Cheers,


